I might sometimes look like I know what I am doing, but the truth is, I am still just a newbie when it comes to spinning. There are so many techniques to try and it is impossible to judge which might be the best until you have tested them out for yourself.
Each time I start a new spinning project, I do try to include at least one new technique to challenge myself and to learn a little bit more about fibre and spinning. My last project, the Drops Design ‘Deep Woods Sweater’ knitted up beautifully, but it ended up REALLY heavy. This was not something I had anticipated, and so reflected on why this may have happened.
Yes, I am tall, and so my clothing is on the larger side, but the weight in the yarn for this jumper was not purely down to garment size. I have other knitted tops that do not weight that much, so there must be more to it.
A friend of mine was spinning up some merino fibre and commented on how light and airy it was. She was spinning from rolags, which was something I had never tried before. Until now I had only learnt what you would call a ‘short forward draft’ technique. After a little bit of reading and YouTube I could see that my technique may have been responsible for the extra weight in my yarn. I was spinning a ‘worsted’ yarn, where all of the fibres are drawn into the twist in a linear fashion. As the fibre draws in, I would gently squeeze them and let it twist through my fingertips to get a lovely smooth single.
I was now keen to try spinning a ‘woollen’ yarn, where the fibres are pulled into the twist in a more irregular way. I wanted to use the rolags along with a long draw technique (something else I have not really done before) as this keeps my fingers away from the twist zone – meaning there is more air caught up in the yarn. In theory, the finished yarn will be lighter, and fluffier, but still warm and cosy.
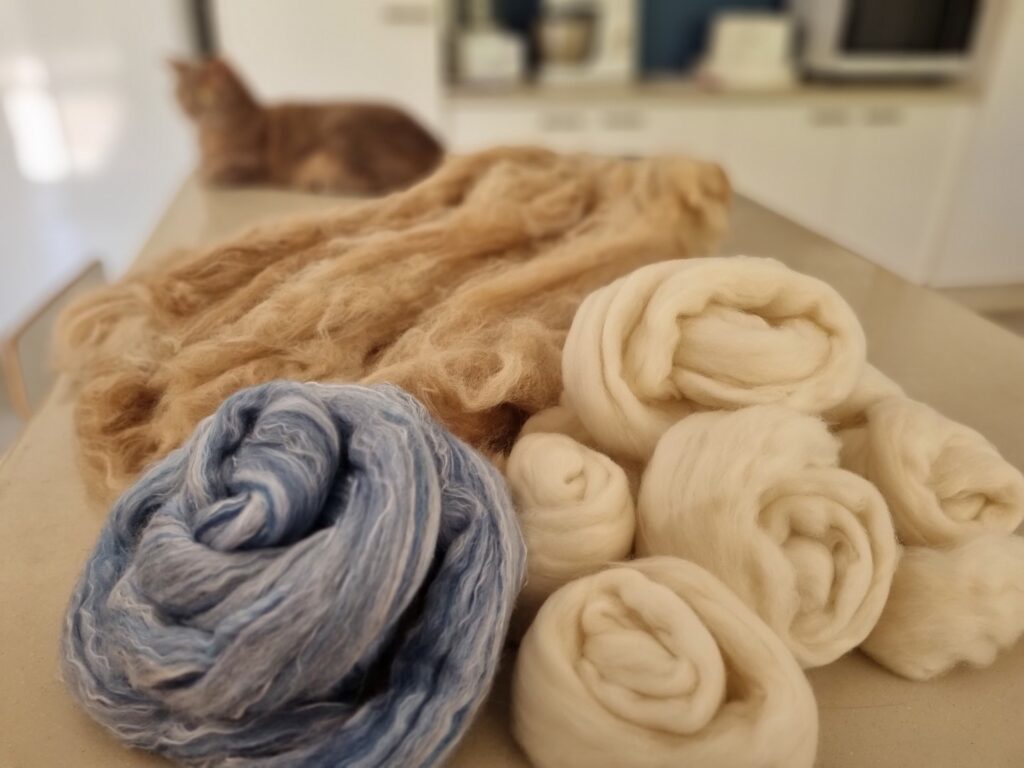
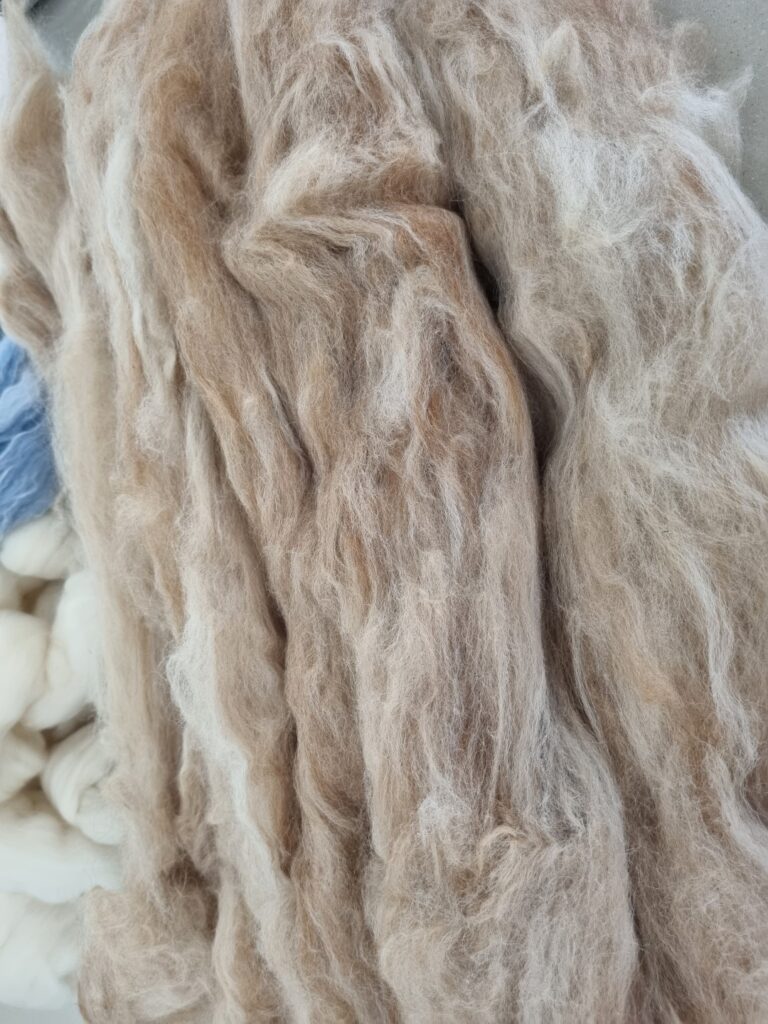
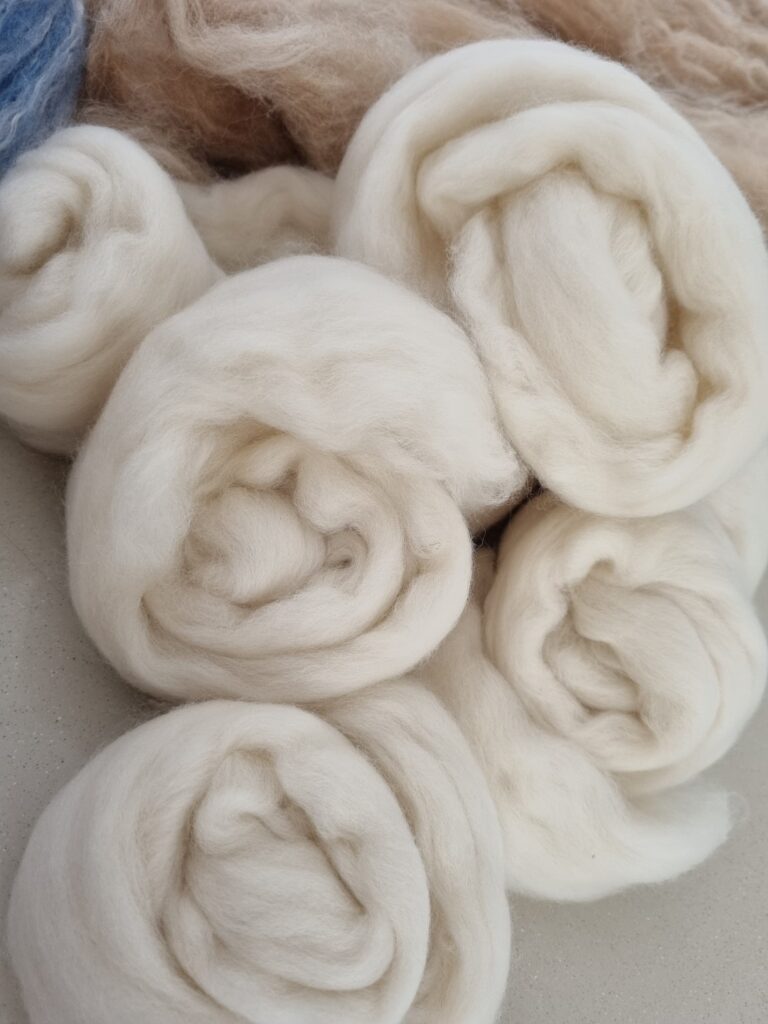
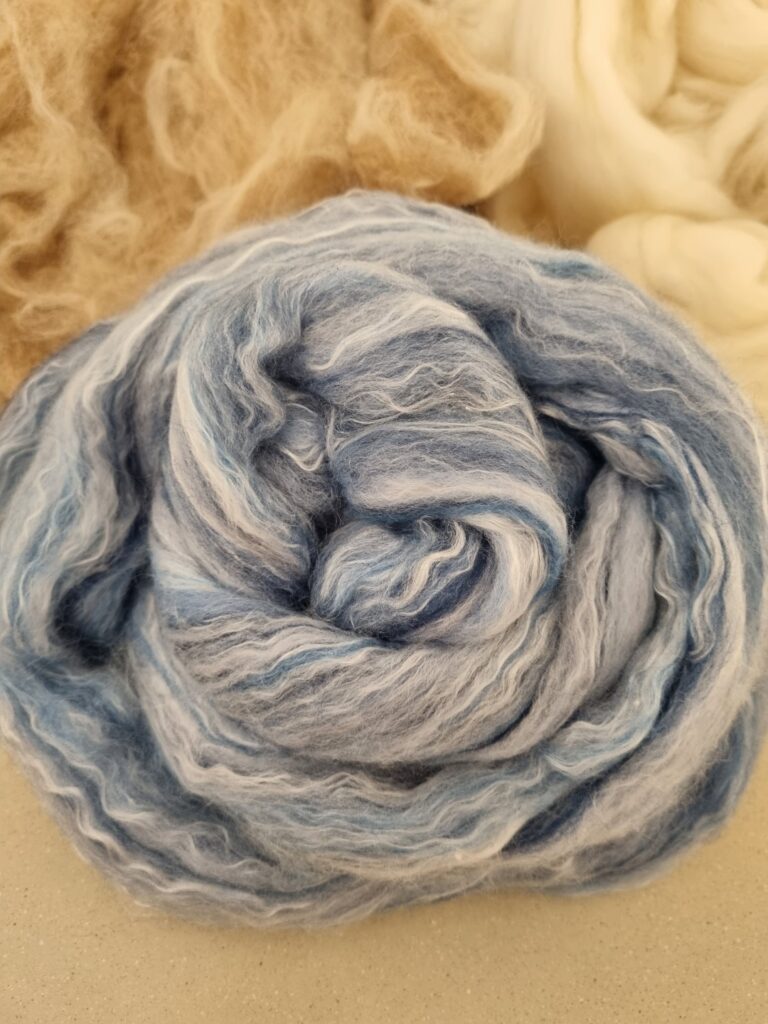
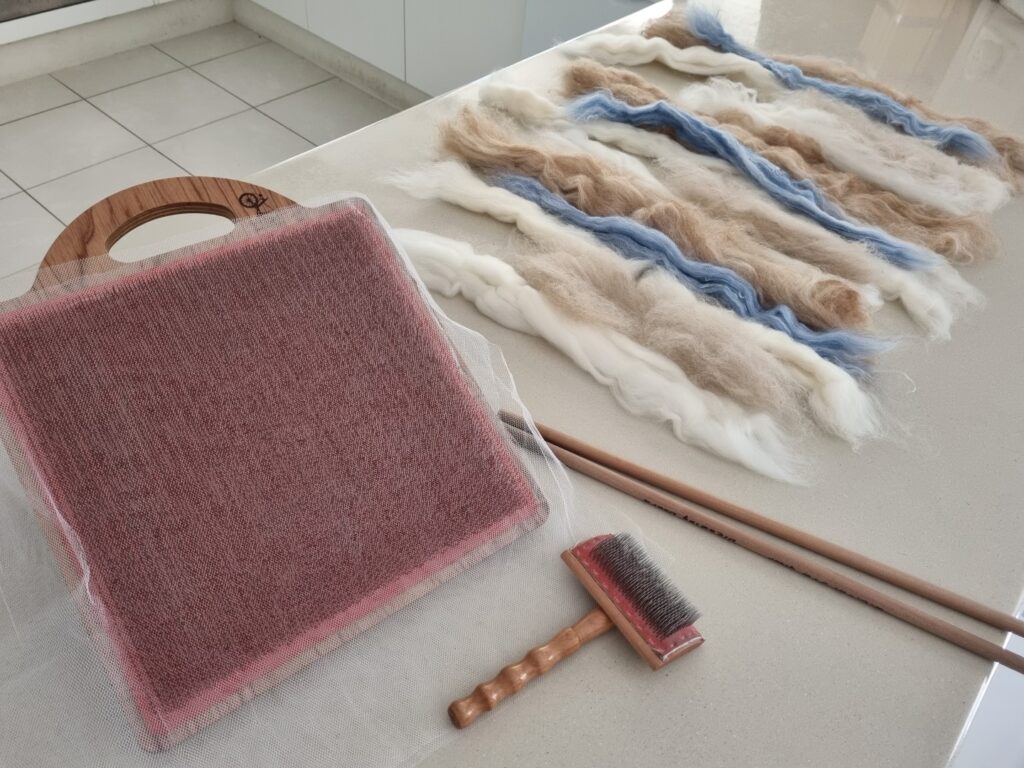
For this project, I had a bag of mixed alpaca in various browns and fawns that I had acquired somewhere along the way. I wanted to mix it with some merino (from what seemed like an endless bag of commercially processed fibre that came with my spinning wheel when I bought it years ago) and to give it a bit of colour, I had some Ashford ‘Skyscape’ (merino/silk blend) left over from my ‘Ankers summer top’ project from a year or so ago. I ran the alpaca fibre through my drum carder to get it clean and smooth, then set myself up to create the rolags on a blending board.
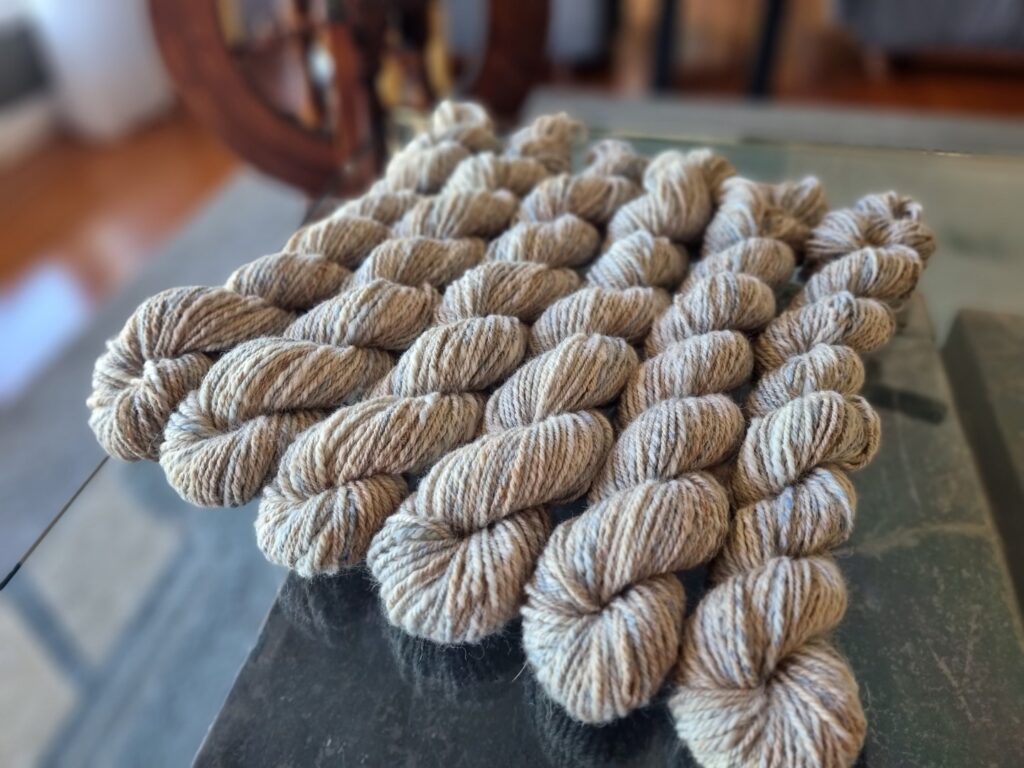
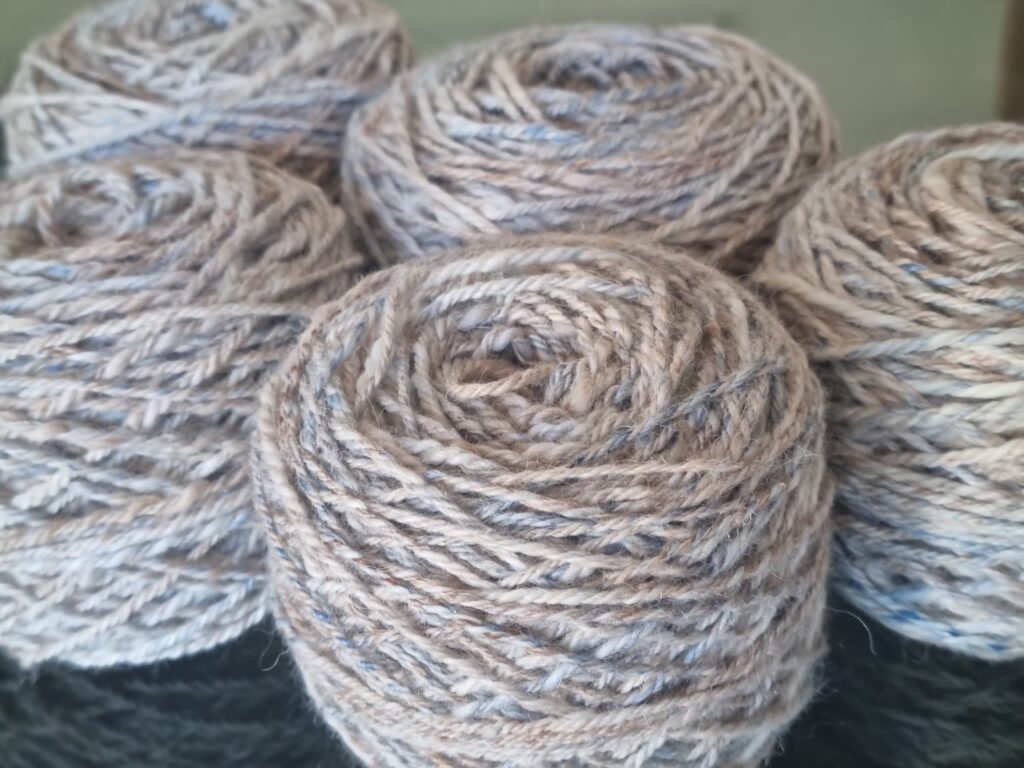
From the weight of the 3 fibres that I planned to use up on this project, I knew I would have only just enough for a short sleeve or singlet top (based on my previous project quantities) so I used my kitchen scales to divide it up into 7 equal batches that would each make up a 100g skein. It is important to prepare each bundle with the fibre/colour measured out equally so that each spun skein finishes up with a similar appearance – well that’s if you want your finished garment to look like it has been made from the same ‘dye lot’ anyway..
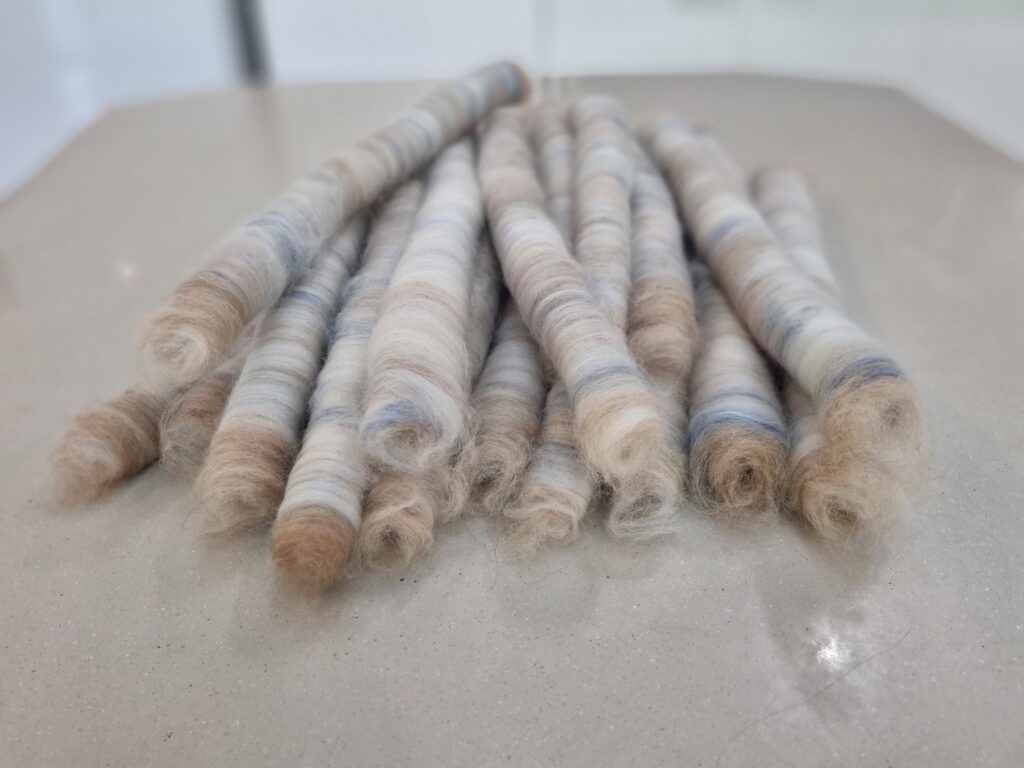
Once split into batches, each batch was split into 3 more sets of equal colour portions and I got started on producing the rolags on the Ashford blending board. I was aiming for 3 rolags per 100g, with each being 30 – 35g. This was certainly at the max capacity of the blending board and they ended up pretty fat, but they worked just fine.
I wasn’t really looking forward to this bit, I thought it would be a bit tedious, but it turned out to be pretty enjoyable. Laying each colour down was like painting with fibre, and seeing the rolag roll onto the sticks to make a beautifully coloured ‘log’ to spin from was actually pretty satisfying. I also like the way the rolags held together in my storage bag while waiting to be used, they were much tougher than the loosely coiled up rovings that I have prepared in the past.
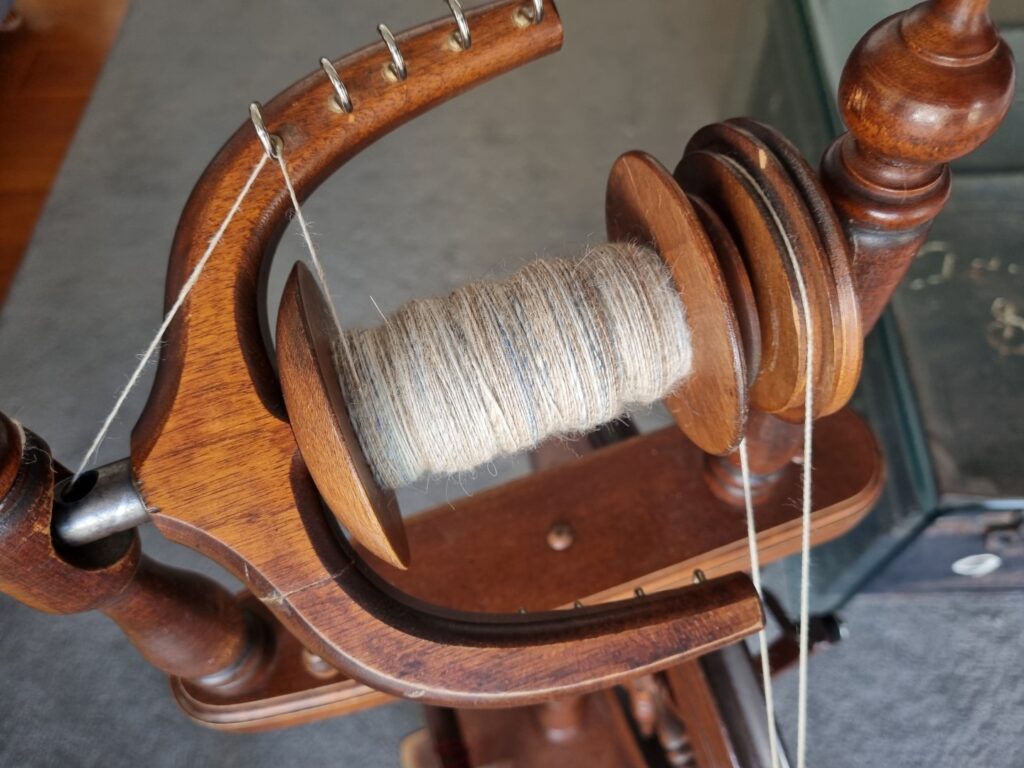
Spinning with a long draw technique took a bit of getting used to, but once I had worked it out, I was surprised to find that it felt much quicker than the technique I was using before. I don’t have any evidence that it is quicker to be honest, so maybe I am just getting better with experience, but I found myself working through the bag of rolags, then chain plying the single to finish one quick skein of yarn after another! Infact, I got it done so quickly that I forgot to take a photo or video of the actual spinning from the rolag haha.
The finished colour ended up VERY similar to my last project, which did surprise me a bit because the fibre source and preparation technique was quite different. I did find the pops of colour using the rolag technique were much stronger, where as my last project with fibres mixed on the drum carder, was a much more subtle and spread out blend.
For this project, I finished spinning before choosing the pattern.. this was a tough lesson last time after running out and needing to buy/blend and spin more so that I could finish knitting.
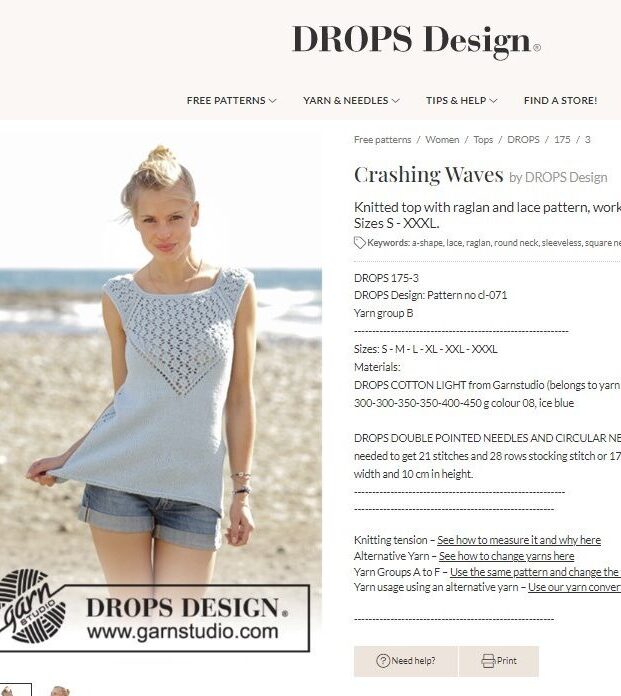
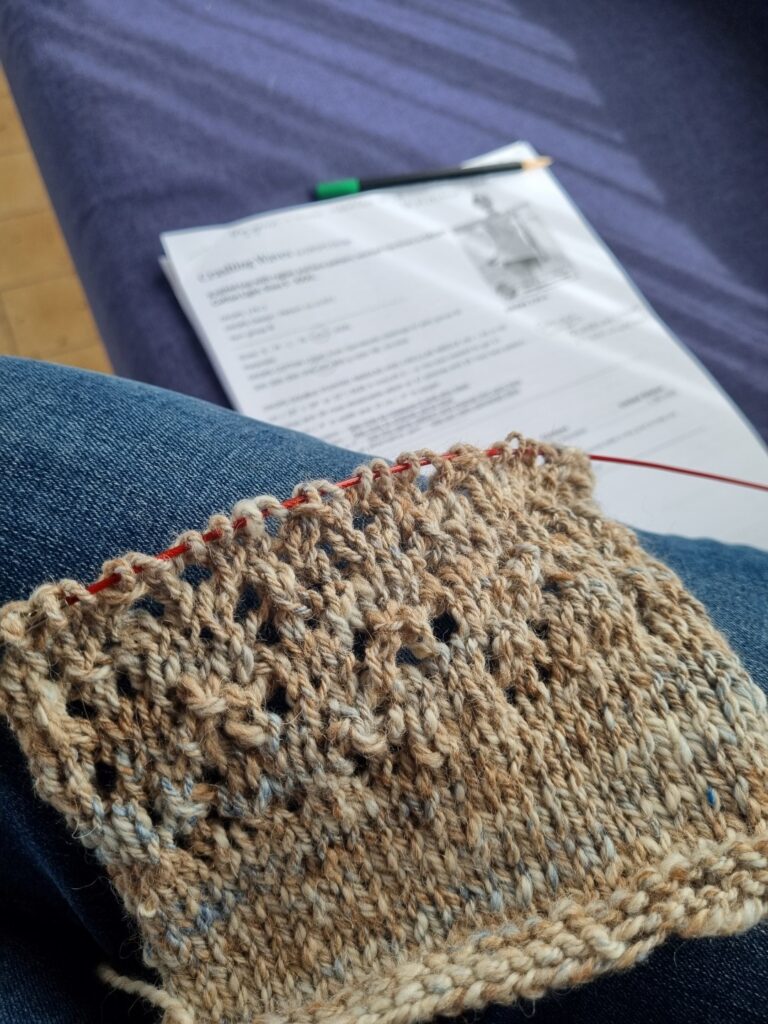
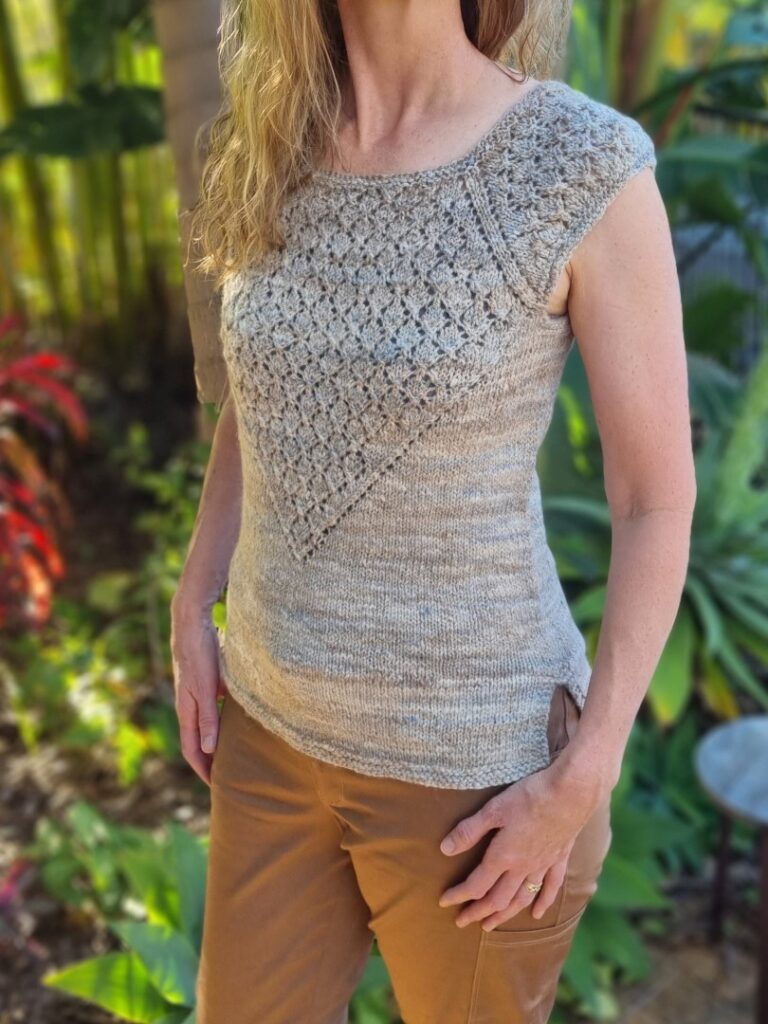
I found the ‘Crashing Waves’ pattern on the Drops Design website (pattern link) and felt that with a little modification of the bottom half, I would have enough yarn and end up with a top that would be suitable for our warmer climate. Following a quick swatch, I knew what I needed to do and got started on the knit.
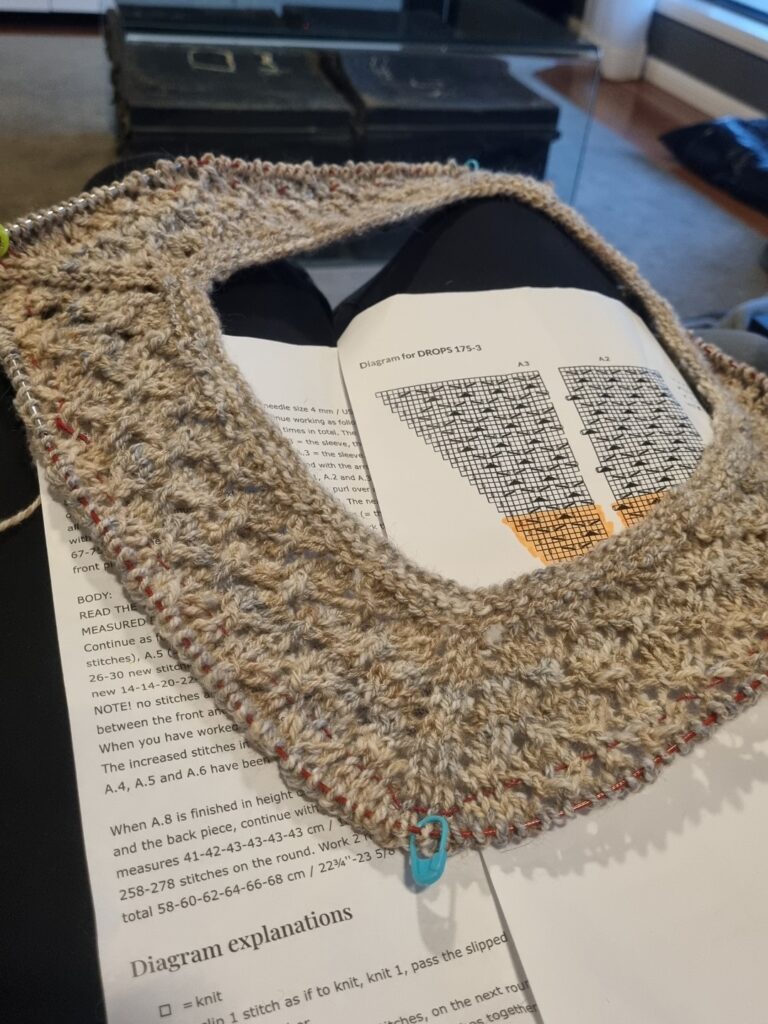
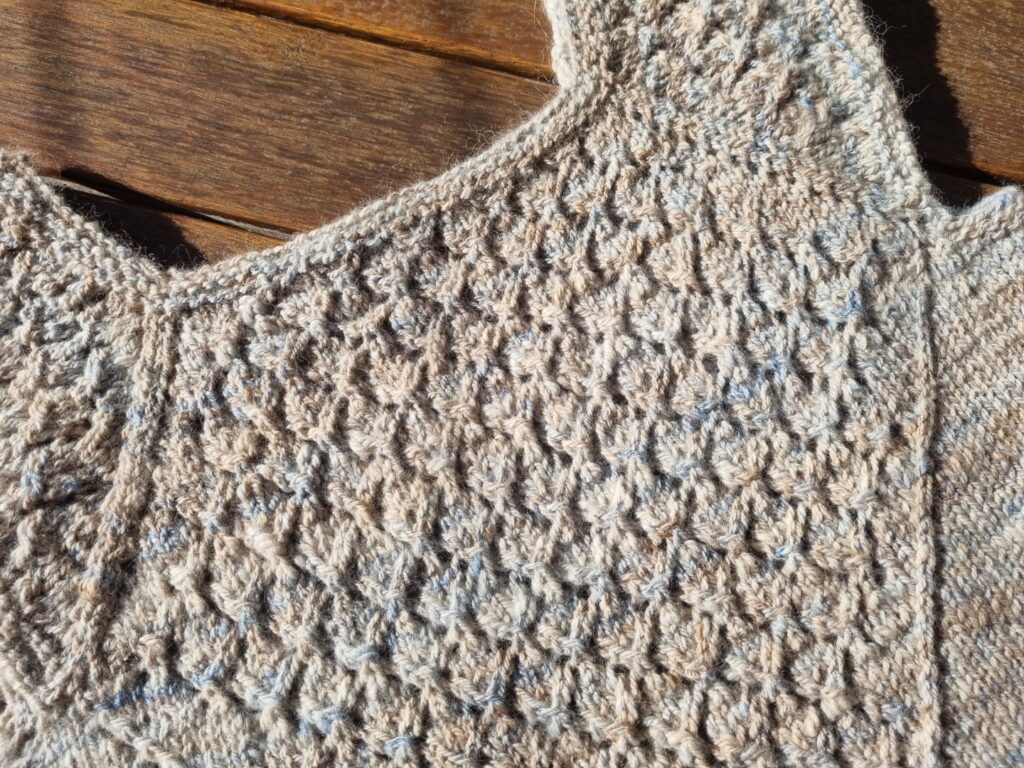
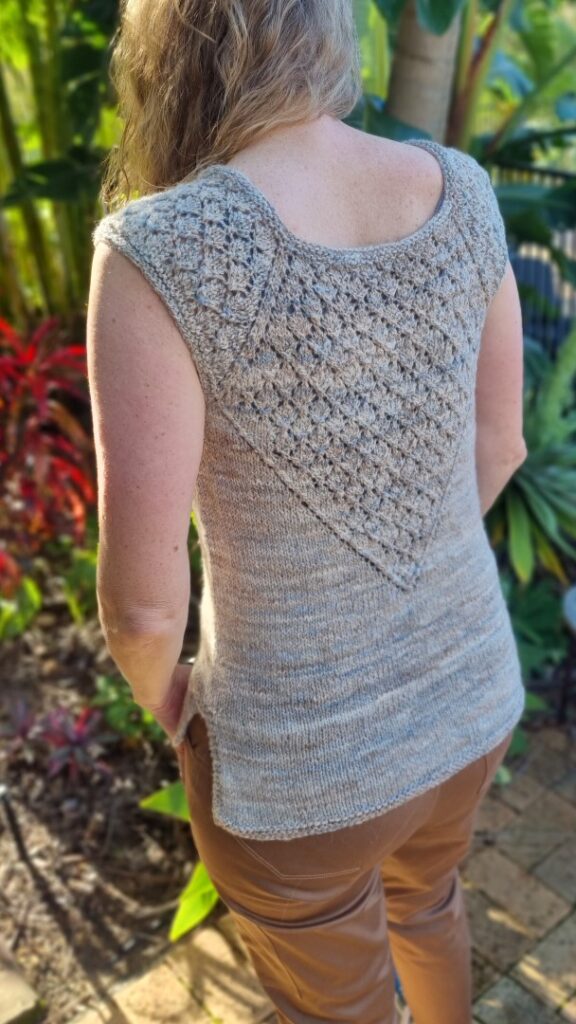
I LOVE top down knitting, but had found that my last two projects are very high at the neck. This design has a lovely big square neck line, and I knew I would be able to test the fit of the cap sleeves and arm holes before getting too far along with the project. The lacey pattern was something new for me too, and it wasn’t too hard to follow the instructions, especially when the Drops Design website has instructional videos at the bottom of the page, as well as clear printable pages for all of their free patterns.
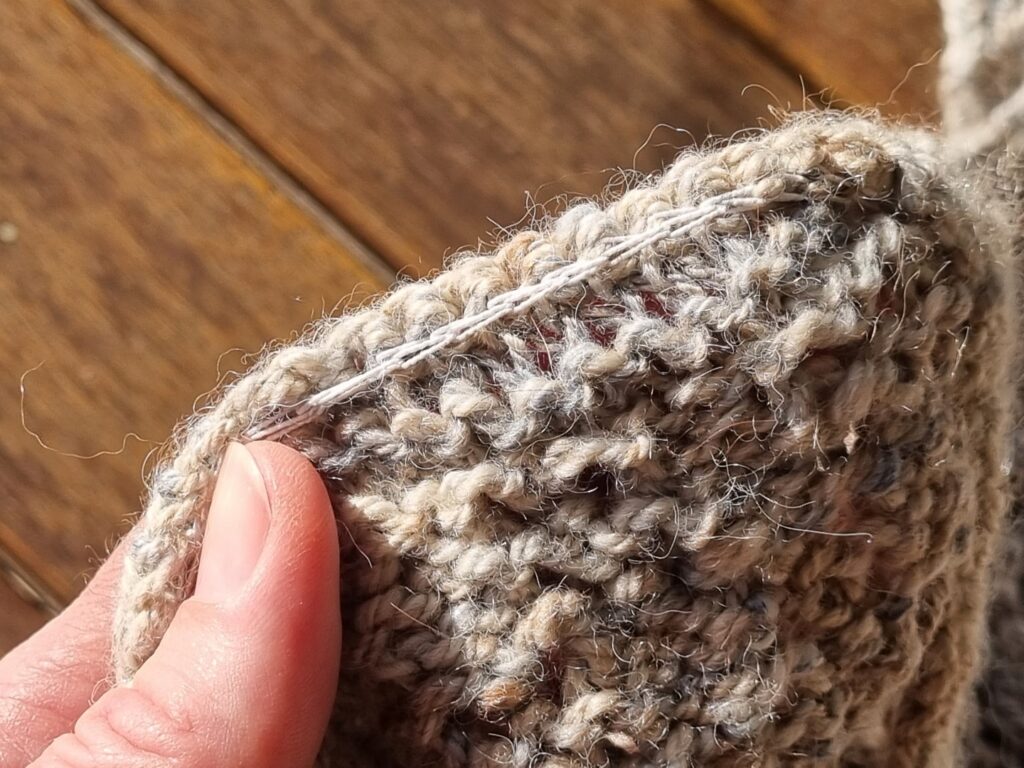
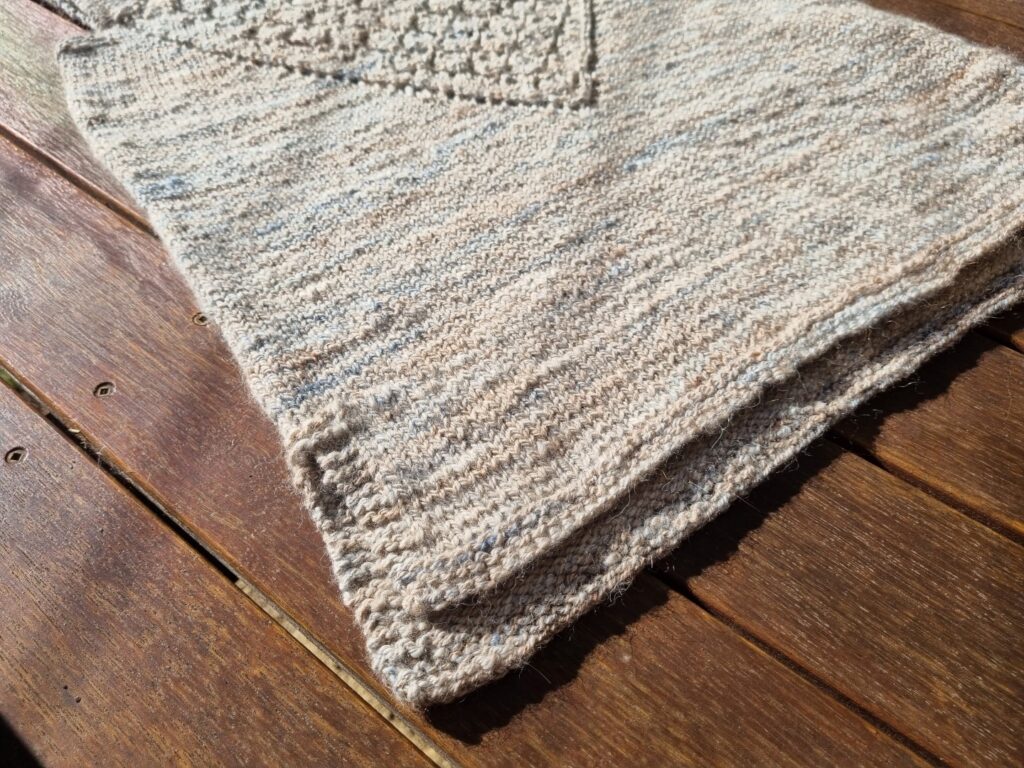
I used the instructions down to the bottom of the V shape, but didn’t include the lace detail down the sides. I also chose to finish the lower part of the top with a more rectangular shape (I didn’t want it to flare out) so I just continued with stockinette stitch, testing the length as I went, before creating a split at the sides and finished the front just a little shorter than the back. Another little trick I used, was to chain stitch some shirring elastic around the top of the arm holes so that the outer edge would pull down around my shoulder rather than stick out straight.
The biggest surprise of all, was that I completed the top with only 5 out of the 7 skeins! I realise that the top is sleeveless and also has a more open/lace stitch pattern, so it is hard to compare exact quantities of yarn to my previous projects, but I can tell you that the yarn is ‘lighter’ and ‘squishier’ and I am confident it will be easier to wear than my last (super warm but heavy) jumper.
Apparently a down side to a woollen yarn is that it is not as ‘tough’ and may pill more, so I will be interested in how well this washes and wears over time.
I am really happy with the finished top! It fits just right, the style suits the climate here and it goes nicely with the sort of things that I wear – this will definitely be worn a lot 😊