First time vinyl wrapper.. giving new life to our 91 Celica
So here’s another story about taking an opportunity when it presents itself.
Last year was all about driving and cars in our house. It has never been unusual for my mechanic husband to have a few car projects on the go, but the last 12 months have gone to the next level with my daughter recently getting her licence and discovering that she too wants to drive something a bit special.
I’m not going to lie, I do love a good reno project and throwing some time into making a car look awesome definitely appeals to me. With a little bit of history working in the sign industry and an interest in vinyl wrapped cars I figured.. How hard could it be?
It would be wrong to claim that I did this project on my own. When you watch the YouTube videos (and yes, I did watch a lot of YouTube videos) they show people wrapping these stunning luxury cars all by themselves. Well that’s great for someone who has had a bit of practice, and lets be honest, probably some kind of formal training as well.. but this was going to be my first attempt so I made sure I had some extra hands to help out.
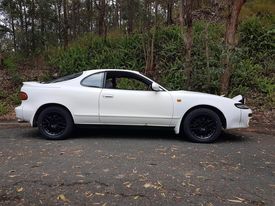
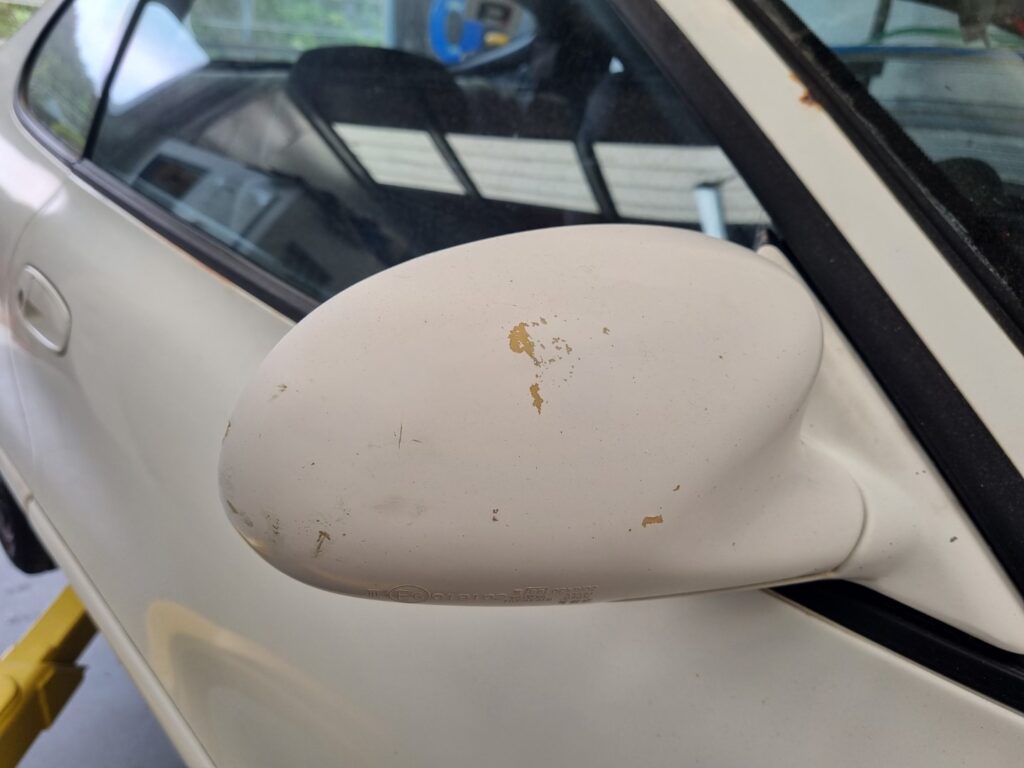
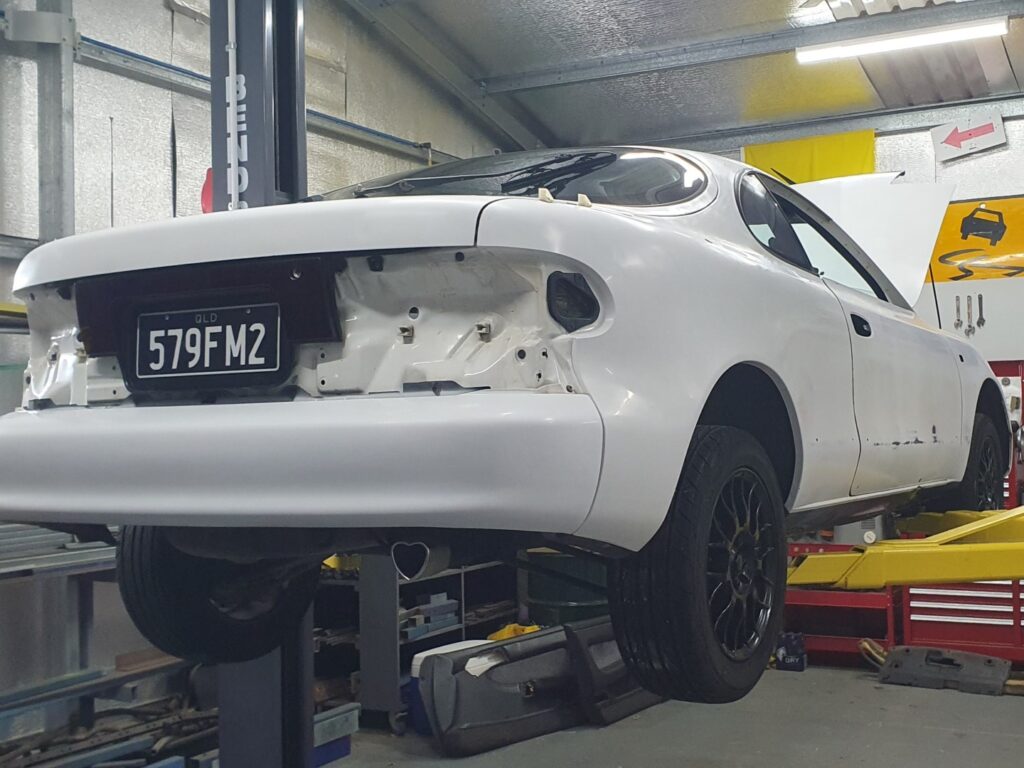
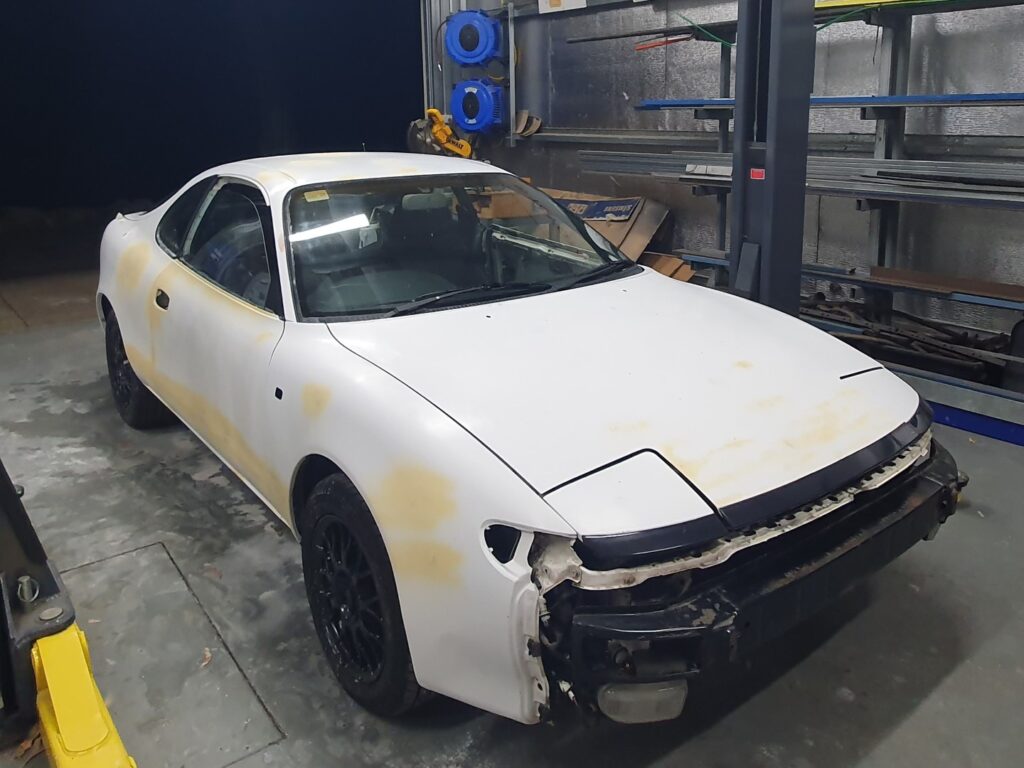
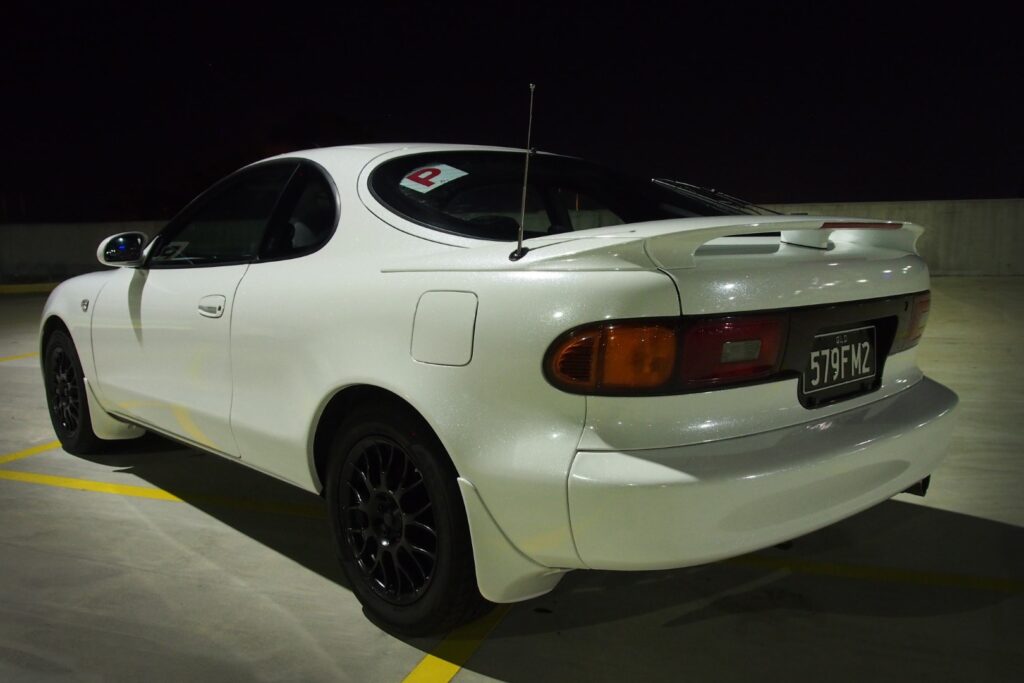
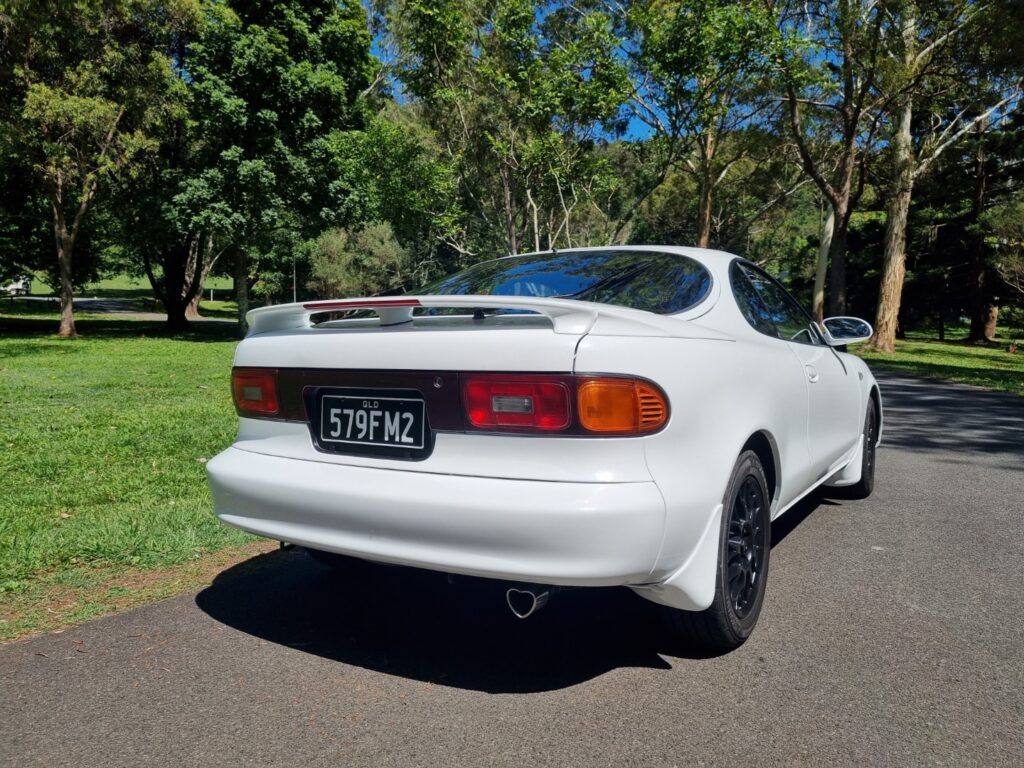
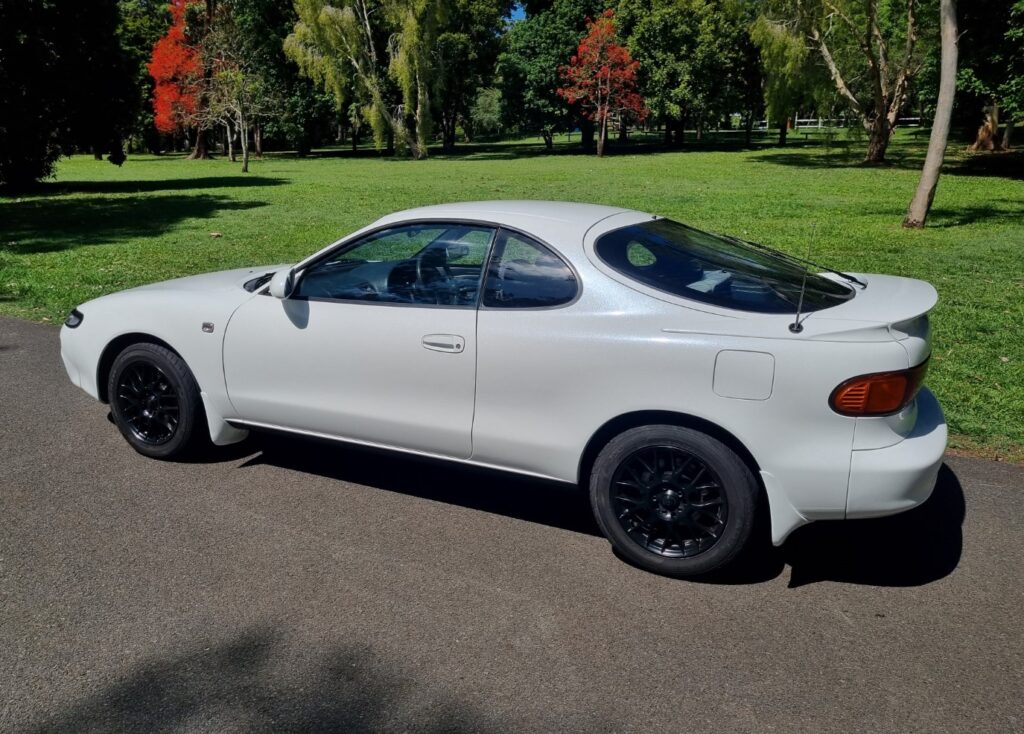
Our car project is a 30+ year old Toyota Celica. While the body was pretty straight, the plastic bumpers, side stripes and mirrors were in pretty poor condition and the overall paint work had lots of stone chips and a tiny bit of rust. The paint was dull, but there was no clear coat peeling off like you often find on old cars. One of the biggest issues with a car like this, is that every join and crevice has 30 years of dirt stuck in it – which does not provide great conditions for a vinyl sticker to adhere to.
So back to the ‘wrapping’ YouTube videos that you often see. The process of applying wrap by peeling the backing off and lightly placing it onto the car body, to then pull off and stretch back on sometimes 2 or 3 times is all well and good on a car with perfect paint. It is not surprising that many websites warn newbie wrappers like me that the car must have an excellent paint finish before wrap is applied. If I took this Celica to a pro wrap shop, they would probably send me away because they wouldn’t want to touch it.
Don’t let good advice get in the way of a great idea though I say. While I knew that there were a couple of issues that would need to be addressed, I did find a few videos that showed me that wrapping a ‘not so perfect’ car is do-able. You do need to weigh up the cost of wrap (DIY) vs paint, and set a realistic goal for what the finished car is going to look like. For us, the wrap option was going to be much cheaper than paint, and we could do it ourselves at home, whereas we didn’t have a suitable space for a DIY paint job. I was happy to accept that this car was never going to come out looking like a freshly wrapped 2022 Lamborghini, but it didn’t cost us that much either.
There were a few other jobs that needed to be done on the car – things that fall into my husbands domain – like installation of remote central locking and an awesome set of speakers and subwoofer, the replacement of a broken door handle and other broken bits, swapping the interior door liners and some other bits of trim, as well as some other mechanical jobs.
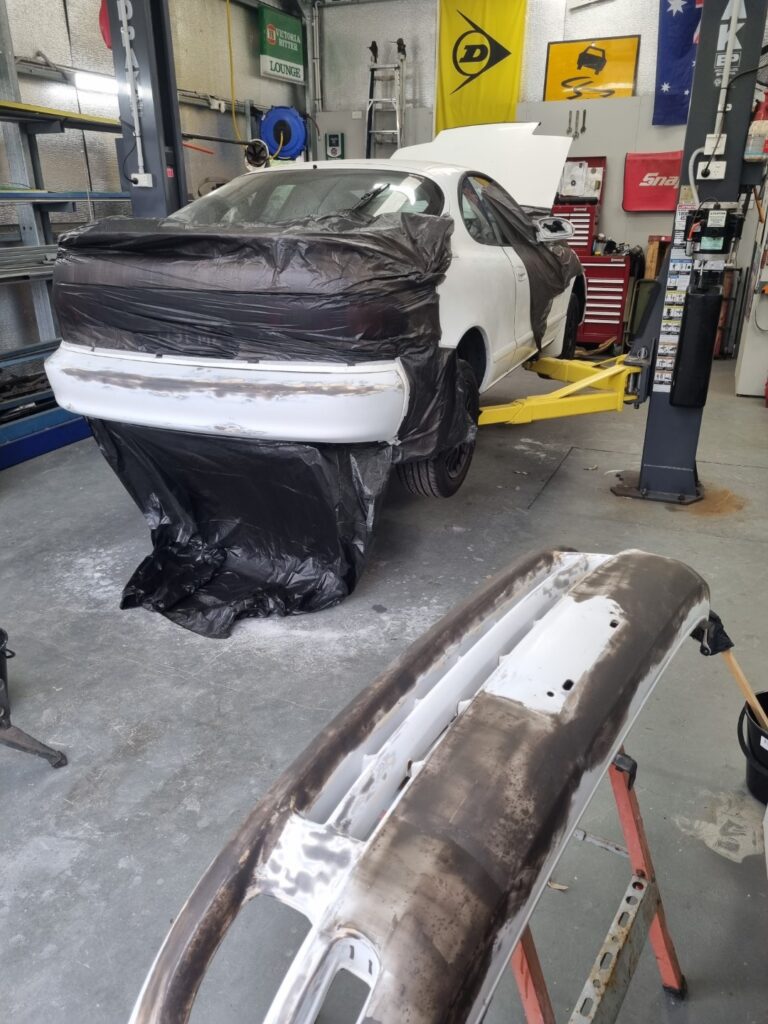
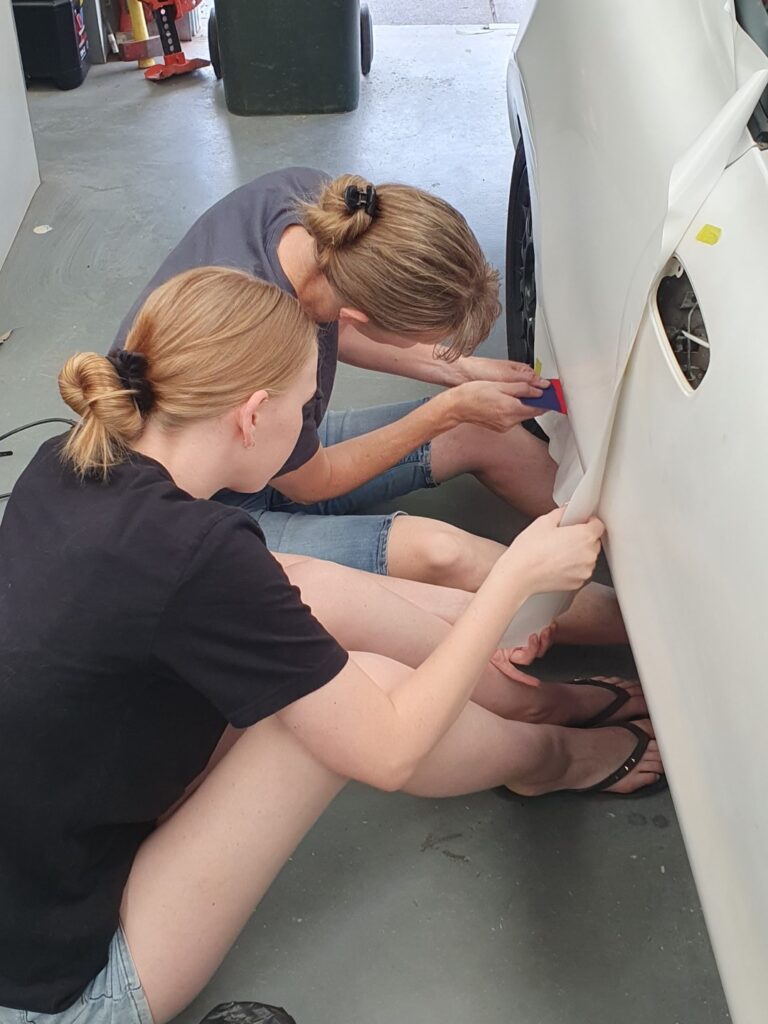
We decided to do all of the jobs at once so that we could both take advantage of having as many bits of trim, lights etc removed and out of the way while wrapping as possible. Although some would say that this was not necessary, it definitely made the job easier.
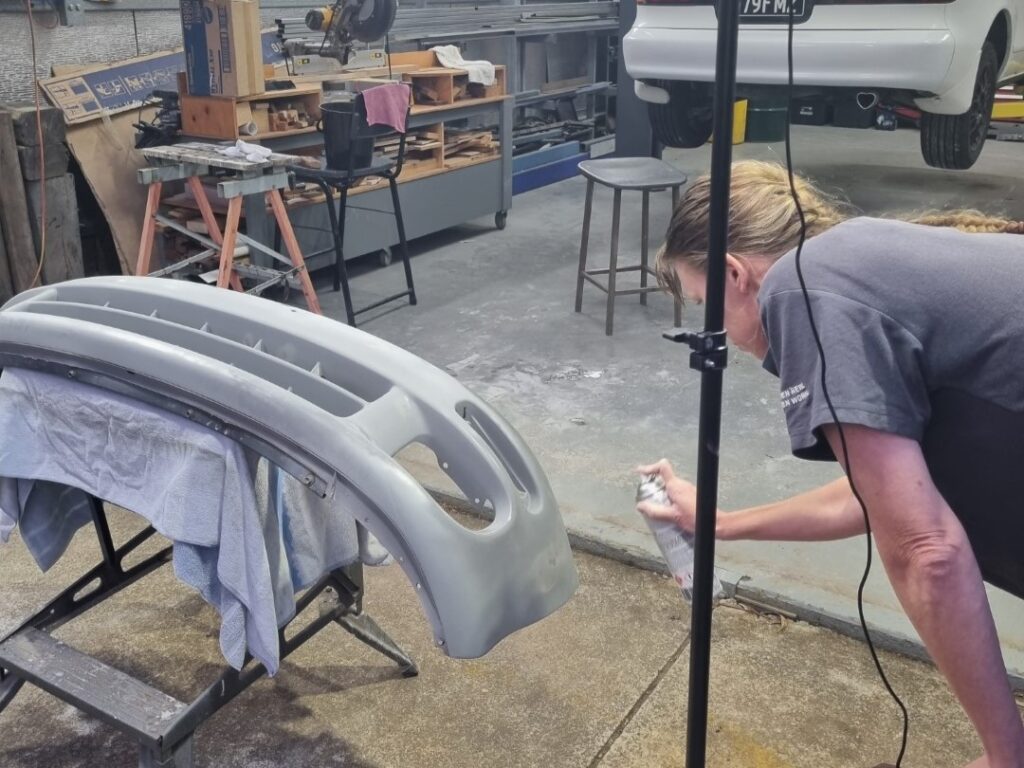
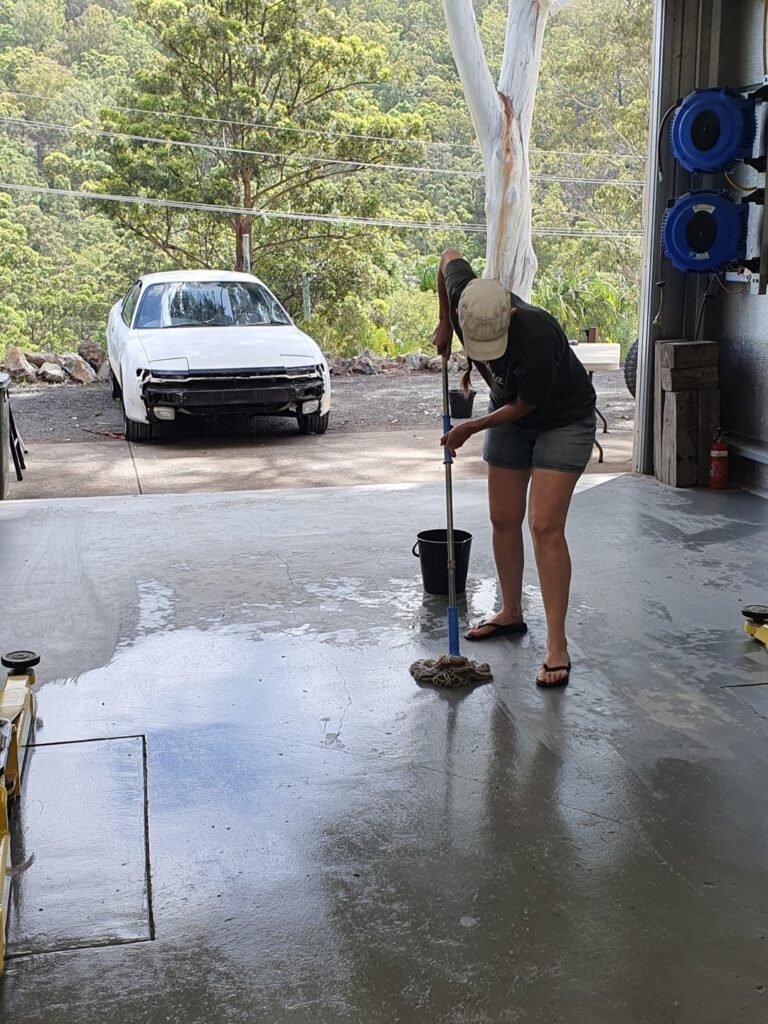
The body prep included; removal of lights, panels, trim etc; pulling off the side strips (that we decided would not be going back on) Sanding, bog, sanding, primer/filler, sanding, enamel coat in some areas; and then cleaning.. everywhere..
To minimise waste (I don’t like waste, and I don’t like spending more than I need to!) We measured up all of the panels and I drew up a cutting plan. I was pretty surprised that this little car was going to use around 15m of vinyl (@1.5m wide)
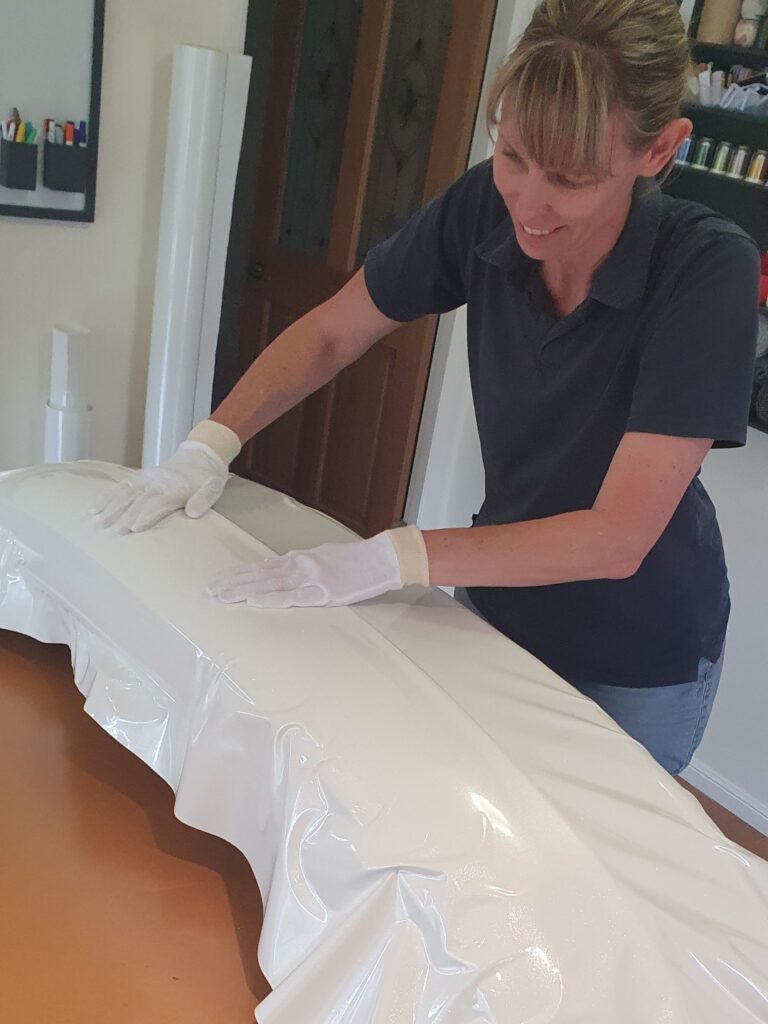
I made sure I had all of the tools we would need – a few felt edged squeegies, a couple of pairs of cotton gloves, knives, scissors, poking tools (we used some from a set of cake decorating/fondant tools), heat gun, lots of clean rags, tape, grease and wax remover..
And we got started.
The first little panel went really well. Yay!
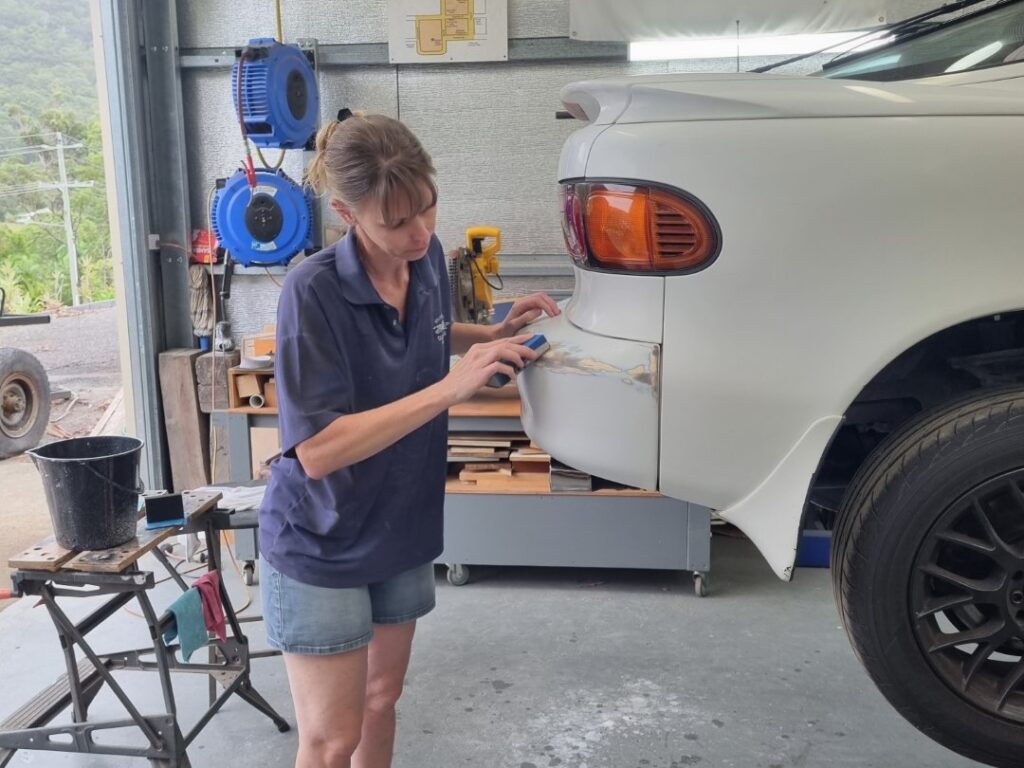
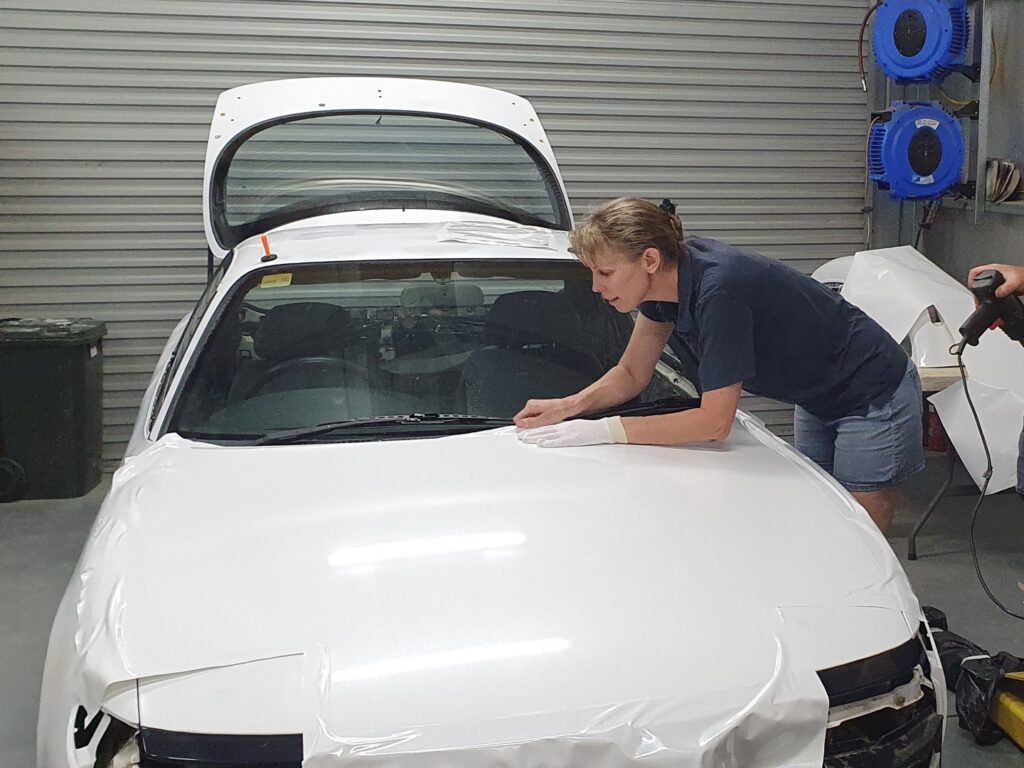
We decided to do the front bumper next – this was always going to be a tricky one. I am still undecided about whether doing this part early was a bad idea, but lets just say it didn’t go as well as I would have liked. I quickly worked out that I needed to heat and stretch the vinyl much more at the corner curves, which should have been fine in theory, but unfortunately this was to be our first glimpse of why a perfect paint job is desirable. When we lifted the vinyl to have a second go at stretching it out, it pulled up a heap of tiny little dots of paint. This then showed through the vinyl like dirt as it had stuck to the adhesive and repositioned itself in a new spot! We managed to get the front bumper finished (after hours of work!) but will probably take it off one day and re do it when I have some spare time. The good thing to come from this was that I now realised how careful we would need to be with our paint situation.
Wrapping this car, with this quality of paint work was not going to be impossible. That front bumper was just a reality check, and now I knew that my technique needed to consider the vulnerability of the surface. I could get away with some repositioning of the wrap where it had lightly stuck down, but we had to be careful not to press on it in any areas that would need to peel back. Extra hands to hold the vinyl away from the surface, only partially peeling the backing off where possible and using low tack tape to stop the vinyl from sticking where I was not ready for it yet all helped me to apply the vinyl to this car with no further paint problems. It did make the process much slower though..
So days passed, out in the shed, one panel at a time..
I knew there would be a couple of days in it, but it ended up blowing out to about 4 days wrapping/finishing on top of what we put in to the body prep. A part of the process that I did not consider time for was the post heating. A few videos made reference to this part of the process, but not many made a big deal about it. Sections of vinyl that had been stretched into concave areas, and edges of vinyl that were attached to complex corners needed to be heated up (heat gun and thermometer required) to 80-90°C so that the plastic memory is set into the shape you need. This process should stop the vinyl from peeling back from surfaces where it was stretched into position. The last thing we would want after all of this work is to come out to the car on a hot day to see that it has all pulled away and bubbled up. Doing a thorough post heat took a lot of time that I had not considered.
Time blowout aside, I thoroughly enjoyed this project! Luckily we chose to do this at a time when we were all available for the week, so we didn’t have interruptions and didn’t feel too rushed. It was nice to spend the time working together to be honest – although, I think we were all feeling happy to get out of the shed by the end!
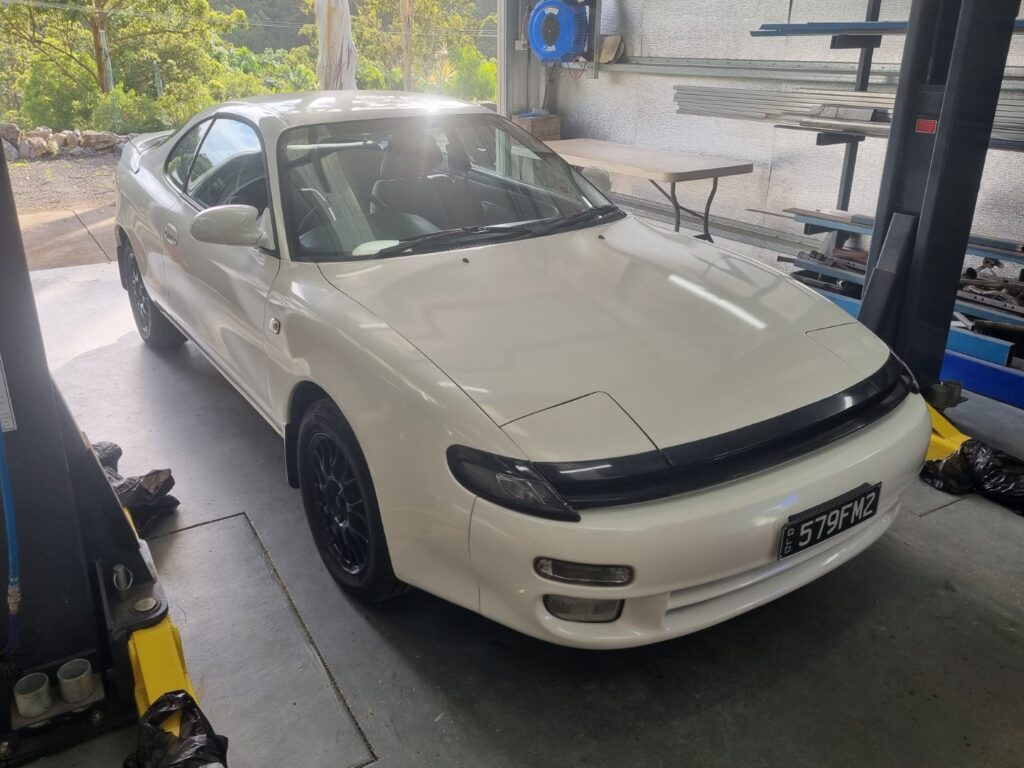
While this car wrap is not an example of wrapping perfection.. I am pretty satisfied with how it looks. I think most people will have to look pretty close to see that I need a bit more practice, and as I said before, I will be happy to remind anyone of how much we spent and what we were aiming to achieve..
Its no Ferrari, but this gorgeous glittery ’91 Celica is going to turn some heads and put a smile on my 17yo daughters face!


1 thought on “First time vinyl wrapper.. giving new life to our 91 Celica”
Thanks!