It all started one day at spinning group, when I was using the wheel I had picked up second hand, only a year or so earlier. I had decided it was time to learn how to spin the many bags of alpaca fibre that were gathering in my garage. My little wheel – A ‘Sleeping Beauty’ ‘Thumbelina’ – had been serving me well, but on this particular day it had developed more squeaks and rattles than usual.
I got chatting to one of the other members of our group, a fellow woodworker/spinner about where the various noises might be coming from and this lead to much discussion about different wheel designs. In particular, we talked about the wheel he was using, that he had made many years ago. I love looking at things other people have made, and I love thinking about how I can make things for myself – so when I got home it just seemed to be obvious that as a woodworker and a spinner, I was going to have to have a go at making my own.
Coming up with a design was a slow process. I looked at countless pictures online and I looked at the many different wheels being used by members of my spinning group. While there are some clear industry leaders supplying the spinners of Australia, when you really have a look around, there are many styles and features that could be considered.
I made up a ‘wish list’ of features that I wanted to include in my own design. My Thumbelina wheel was a great starting point for overall dimensions as I was pretty happy with how it was positioned during use, and also how much space it takes up in my house. I knew I wanted to create something with a more modern appearance, I wanted double treadle, the option for scotch tension, slightly bigger bobbins and I was also keen to have more speed options for different types of spinning. Most importantly, I wanted my design to be really quiet, given this whole conversation started because my first wheel was making too much noise!
Inspiration pictures were printed out, sketches were made, then I got started on some CAD drawings using a cloud based software called ‘OnShape’. This allowed me to start with the critical components, then test out a few different features and easily make modifications to dimensions as the idea evolved. OnShape allowed me to draw the project as parts, then assemble it and even test out the way parts moved and fitted together. I was able to print out drawings to work from, and also create digital files to send to the laser cutter that would be used for the main wheel, bobbin ends and various pulleys.
Having no actual experience with making spinning wheels, some of the design process had to be done after starting construction. As good as OnShape is, I just couldn’t see how some of the moving parts were going to interact, so some prototyping and testing needed to be done.
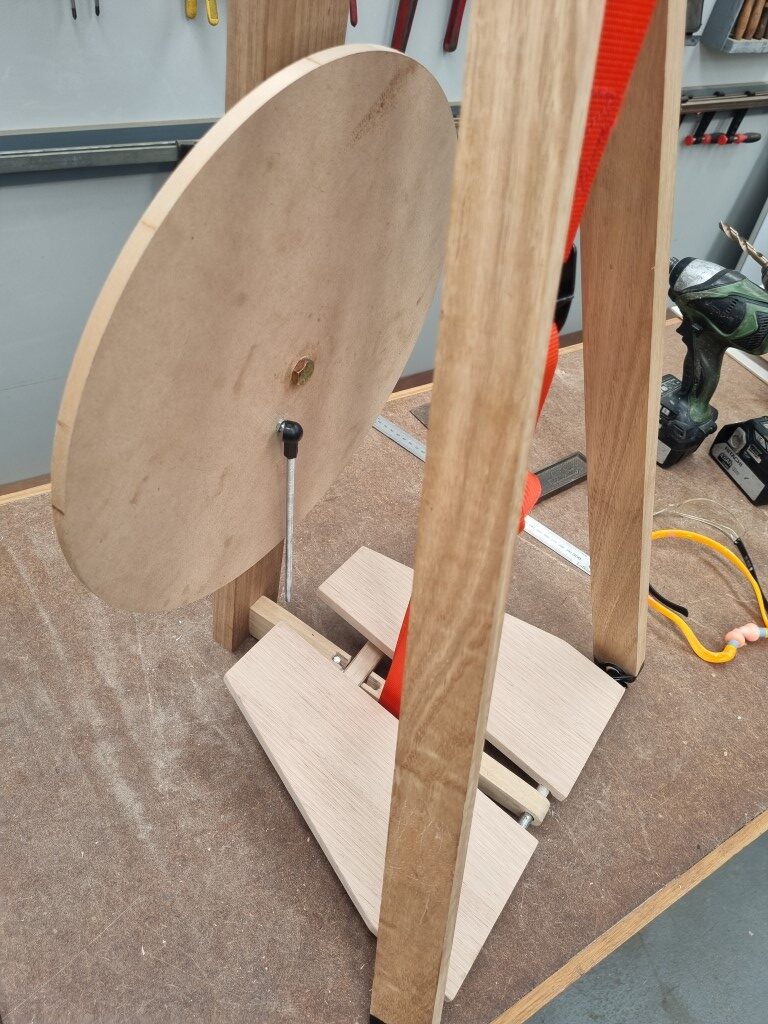
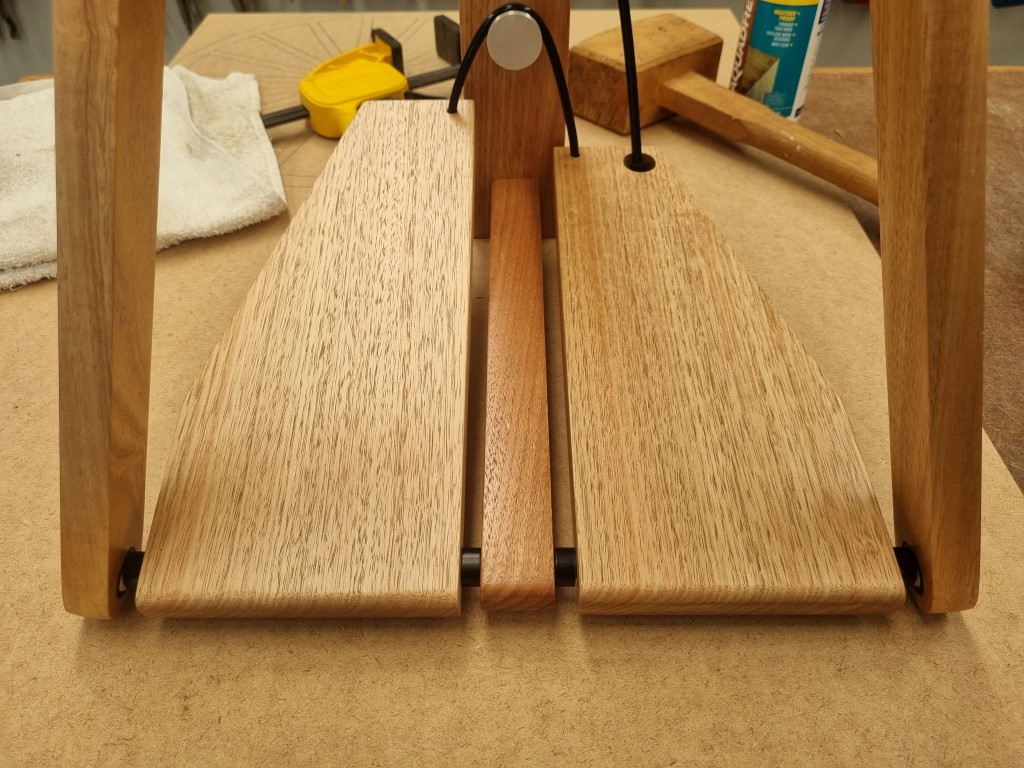
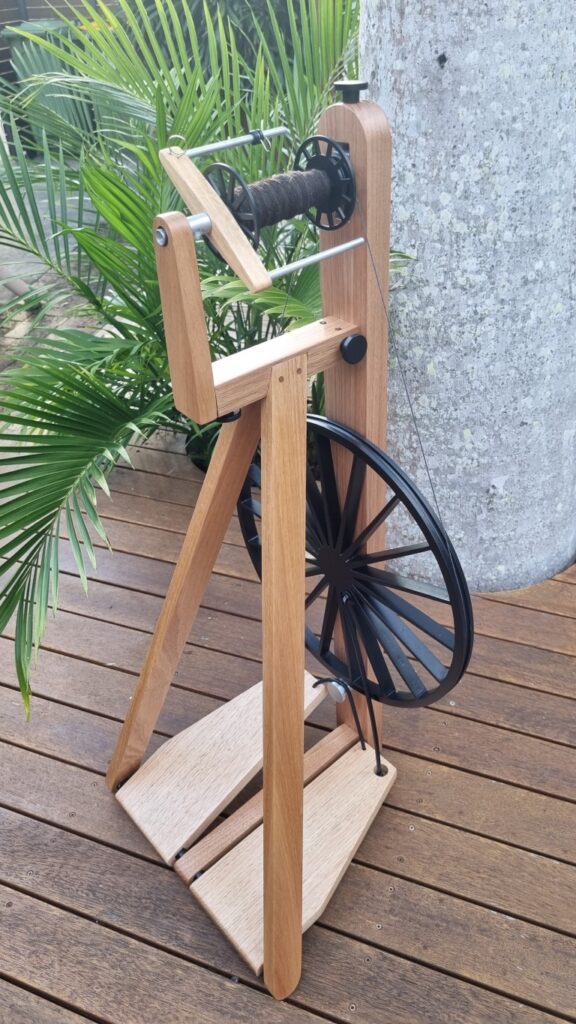
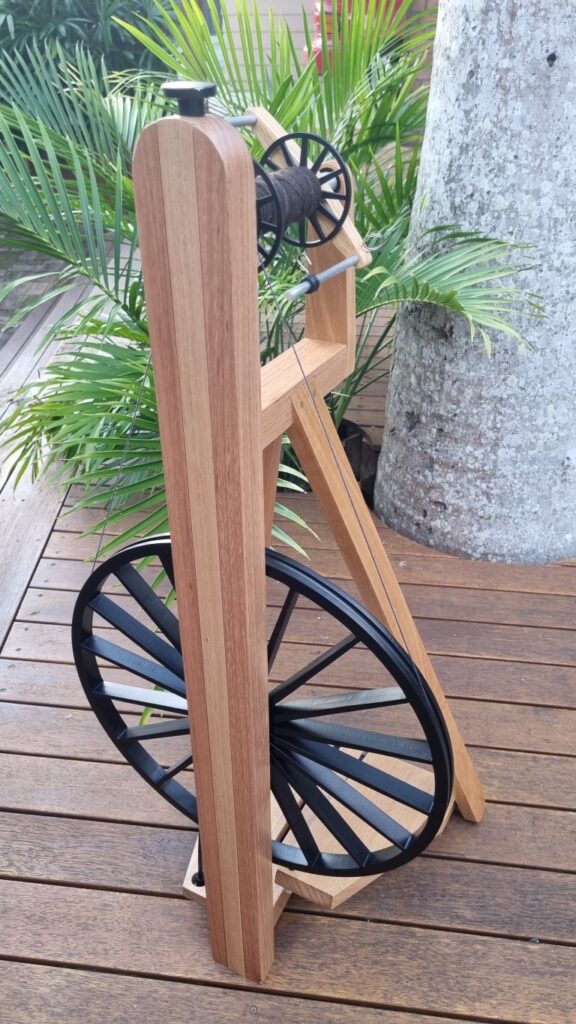
I wanted double treadle, but a single drive rod (also called a ‘footman’ in spinning terms) was necessary due to other design elements, so it took a few attempts to develop a system that would be quiet and smooth. I ended up with a small pulley mounted to the back leg that allowed a band to link the 2 treadles from above. When one is pressed down, the other raises up and the band just goes back and forth. The right hand treadle has the footman neatly mounted underneath and quietly converts treadling movement the rotation of the main wheel.
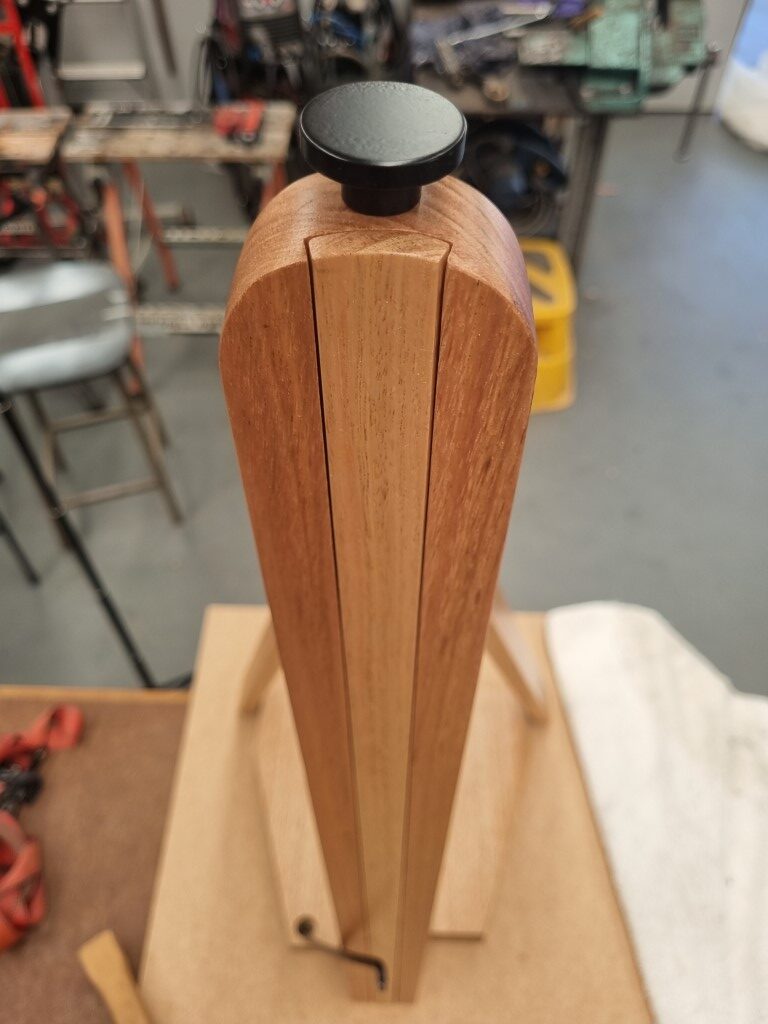
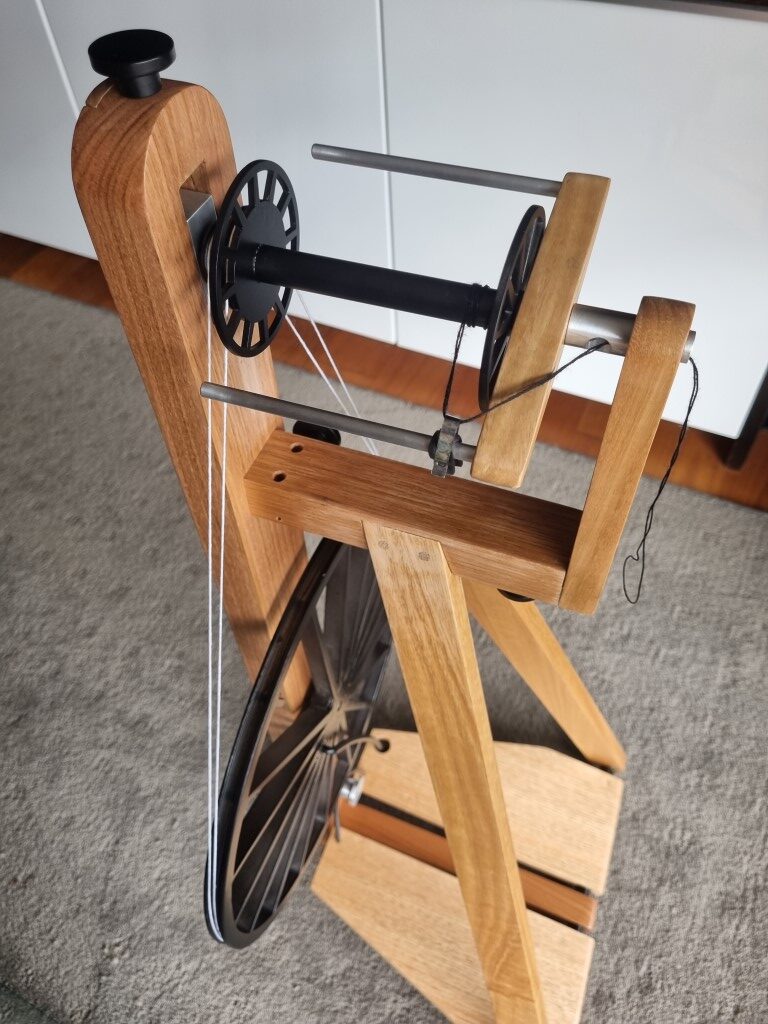
I based the design of the drive band tensioner, the ‘mother of all’ and the ‘flier’ (that’s spinning terminology for the top bits) on the Thumbelina wheel that I already had, so setting it up to be a double drive wheel wasn’t difficult at all. I did have to play around a little with the addition of a tension band so that I have the option for ‘scotch tension’ though. I wanted it to be discreet, so the clear fishing line tension band is attached to a tiny spring that is hidden inside a hole, and the tension adjustment knob is neatly mounted on the side and matches in nicely with the other black knobs used on other parts of the wheel.
When coming up with an overall style, I knew I wanted light colour timber. Aussie Oak was an obvious choice as it was readily available at the local hardware store. I had considered a bunch of different materials for the main wheel, but got hooked on an idea that was originally mentioned as a joke – and that was for the wheel and bobbins to be clear, like glass. I knew it wasn’t going to be the easiest option, but I had experience with laser cutting acrylic and figured I would be able to access a laser cutter to get this part of the job done. Sadly, when I made enquiries about the main wheel using this method, I was told it couldn’t be done due to the distortion and under cutting that would occur from using a laser to cut such a thick section of acrylic. Initially, I didn’t let this put me off, and went ahead and cut/assembled the bobbins. I figured I would be able to do the main wheel by making a mould and casting it from clear resin instead.
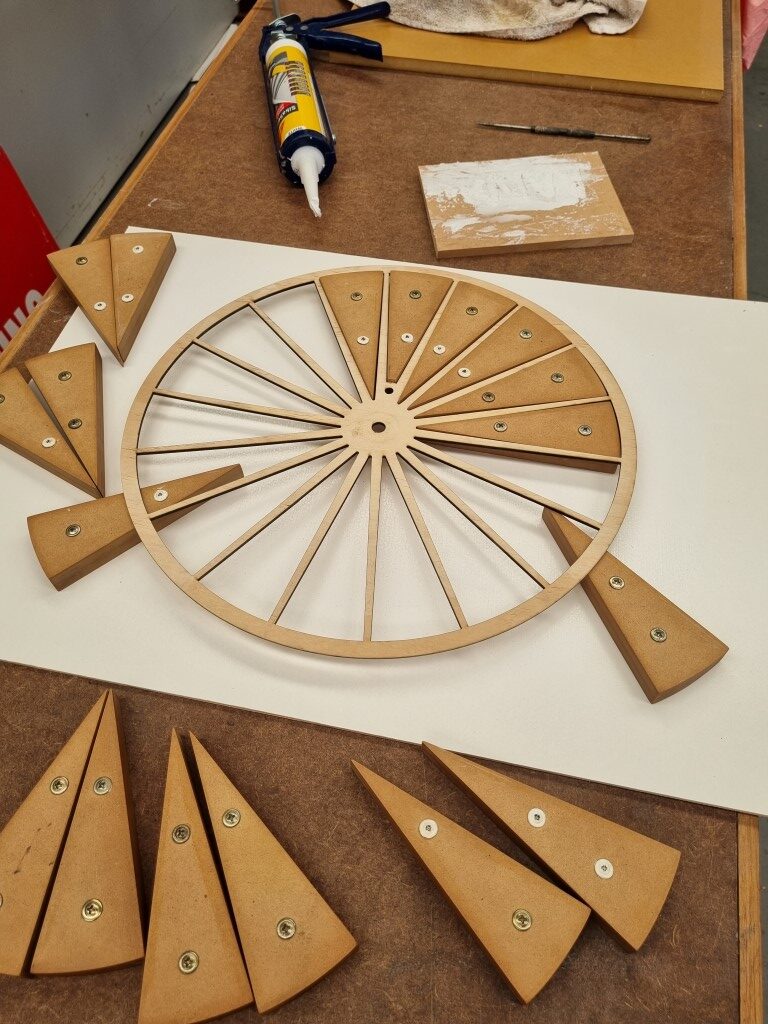
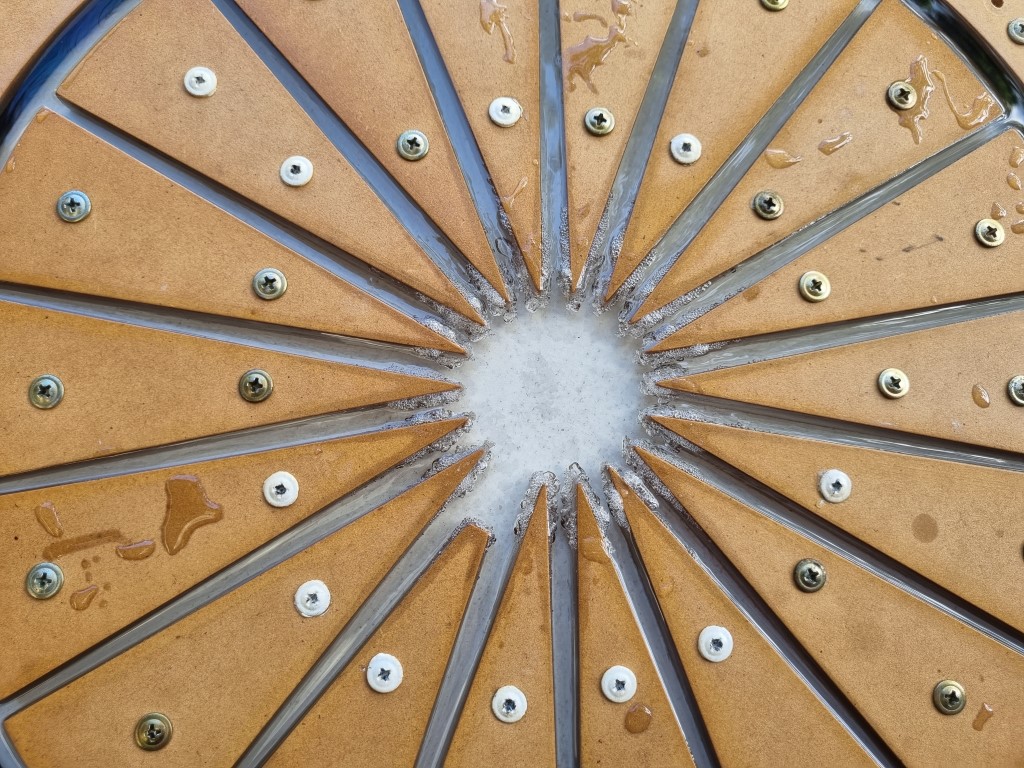
I made up a mould, which took a ridiculous amount of time.. then finally poured the resin.. only to be gutted as I watched my perfect pour go bad before my eyes. I used a tiny bit of heat to pop a few bubbles near the centre of the wheel. It had worked and was looking good, but then next thing.. bubbles just poured out of the MDF mould into the resin at that centre hub area. My lack of experience showing once again I guess.. I think the thin shaping of the spokes at that spot got hot and the MDF reacted badly.
The resin wheel was a fail. I chose to extract it from the mould (which had otherwise been successful by the way) but sadly this meant destroying the mould and making another one was not a simple option. I salvaged what I could, purely for the purpose of setting up and testing the rest of the wheel function before moving forward with another one. After much consideration, I decided to modify the plan and have a black wheel and bobbins so that I could at least finish the project and enjoy using it for a bit before looking at a different option (maybe CNC router) for the clear as glass idea later down the track. For now though, I settled on black and ended up making the main wheel from MDF that has been primed and painted with satin enamel.
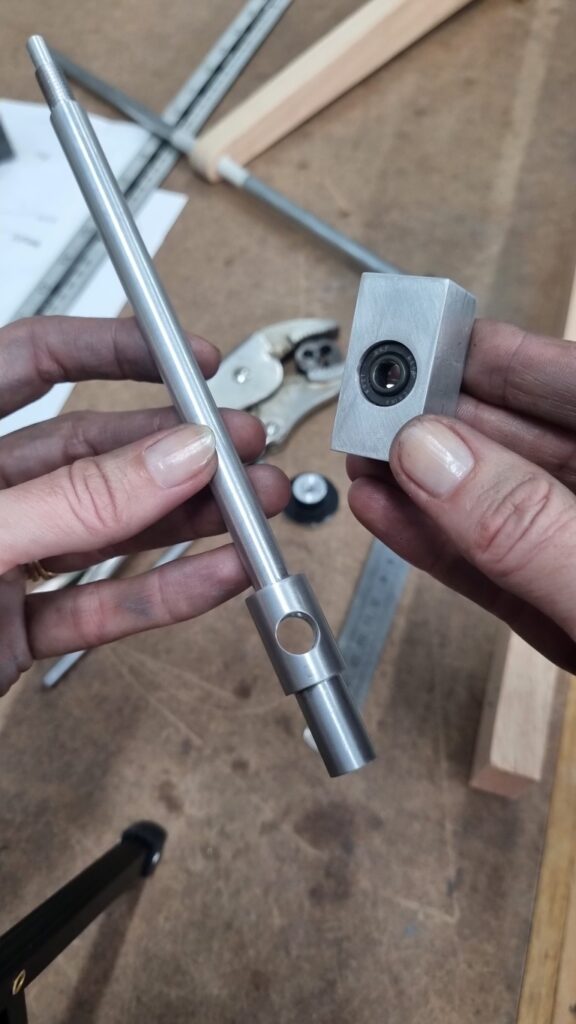
As I am also a metal worker, and have access to a metal lathe, I was able to make every component on this project. I had some bits of aluminium in the scrap pile, so the fact that this was free and also quick and easy to turn, meant that I used it for all of the machined parts. I did this knowing that it was not the ideal material long term, but I was happy to be able to get through my first spinning wheel ‘prototype’ with what I had on hand. The aluminium looks nice, but it is soft and is likely to wear quickly where the yarn passes through the orifice (yes another technical spinning term) and at each end of the flier shaft. Not only will this muck up the dimensions in time, but it does tend to leave black residue on surfaces which might be a problem if it rubs off on light coloured fibres for example. One day I will look into improving these parts for a longer life.
So the days were just slipping by.. and next thing.. it had been over a year since the idea first popped into my head. With a spinners and weavers retreat just around the corner, I recently decided that it was time to get it done. The final stage meant taking all of the bits and pieces apart to properly sand, apply finish and assemble. Several parts had to be painted, polished, screwed or glued into place. And upon final testing, I found one last challenge that I had not anticipated.
Most spinning wheels are made from timber and with a quick look, don’t appear to have anything fancy going on with the drive bands or pulleys, but the relationship of band grip and slip is critical to the spinning wheel doing its job. If you look a little closer at most spinning wheels you will realise that the shape of the pulley may be a V shape or more gentle U shape for example (which is all about slipping and gripping) or maybe the material used for the drive and tension band has been chosen to ensure this relationship is met. The main wheel must grip the band (for reliable drive) and the drive pulley (or whorl, if you want to go with the spinning terms again) must also grip the band so that your treadling makes the flier and bobbin spin around and put twist into the fibre. You really don’t want your drive band to be slipping while you spin.
On the other hand, the pully that is attached to the end of the bobbin must be able to spin freely along with the flier as you put the twist into the fibre, but then needs to grip a little on the tension band when you want to allow the fibre to be ‘taken up’ onto the bobbin. The fact that spinning wheels have been made from timber for, well forever, is probably an indicator that this is a great material to get this to work well. Then I came along and said.. Well I’m going to make my bobbin and pulleys from acrylic and a main wheel from painted MDF..
I shouldn’t have been surprised that it didn’t work on my first go!
I tried different drive bands (different types of string, cord or rubber bands) but ended up going with butchers twine which eventually gripped the pulleys, after I modified them by adding silicone into the groove. The silicone made the drive wheel and whorls really grippy, but the bobbin pulley was left smooth which allowed the right amount of slip to take up the yarn onto the bobbin as you spin.
So, I got there in the end, and just in time to take my new creation to a spinners retreat. What a thrill to be able to use my own spinning wheel design for the weekend, and to talk with those that love the craft about my wheel and the many wheels people had brought along.
If you have made it to the end of this post, I am guessing that you either love to see things being designed and made, or maybe you are a spinner.. Either way, I hope you are inspired by the joy achieved by working through a process to create something special.
Hi Nat, your wheel looks awesome & I enjoyed your “story” of the making of your wheel. Would you be able to put a cost on the making of your wheel & would you ever do it again? I also enjoyed your vinyl wrapping on your daughter’s car. I’m very impressed with all the things that you do, wish I had your energy. It was a pleasure to chat with you at Bornhoffen & I hope to catch up with you at another camp (there is one at Hervey Bay in May & the Gympie retreat is at the end of September) or maybe at Bornhoffen next year. Kind regards
Hi Lyn! It was a great weekend and I have come away with a few new ideas to improve my wheel so stay tuned.. eventually I might get to a point where I have a version that I can be 100% confident in (I love using this wheel, but it has a few quirks that need to be looked at) and then I might make some to sell one day 🙂


2 thoughts on “Making my own spinning wheel..”
Hi Nat, your wheel looks awesome & I enjoyed your “story” of the making of your wheel. Would you be able to put a cost on the making of your wheel & would you ever do it again? I also enjoyed your vinyl wrapping on your daughter’s car. I’m very impressed with all the things that you do, wish I had your energy. It was a pleasure to chat with you at Bornhoffen & I hope to catch up with you at another camp (there is one at Hervey Bay in May & the Gympie retreat is at the end of September) or maybe at Bornhoffen next year. Kind regards
Hi Lyn! It was a great weekend and I have come away with a few new ideas to improve my wheel so stay tuned.. eventually I might get to a point where I have a version that I can be 100% confident in (I love using this wheel, but it has a few quirks that need to be looked at) and then I might make some to sell one day 🙂